How to Break Down a Pork Shoulder: The Complete Butcher's Guide

A whole bone-in pork shoulder — commonly labeled Boston butt at the grocery store — is one of the best values in the meat case. At three to five dollars per pound, you get eight to ten pounds of well-marbled pork that a professional butcher can turn into half a dozen different cuts. The problem is that most home cooks throw the entire thing into a slow cooker and call it pulled pork. That is one option, but it wastes the potential hiding inside this primal.
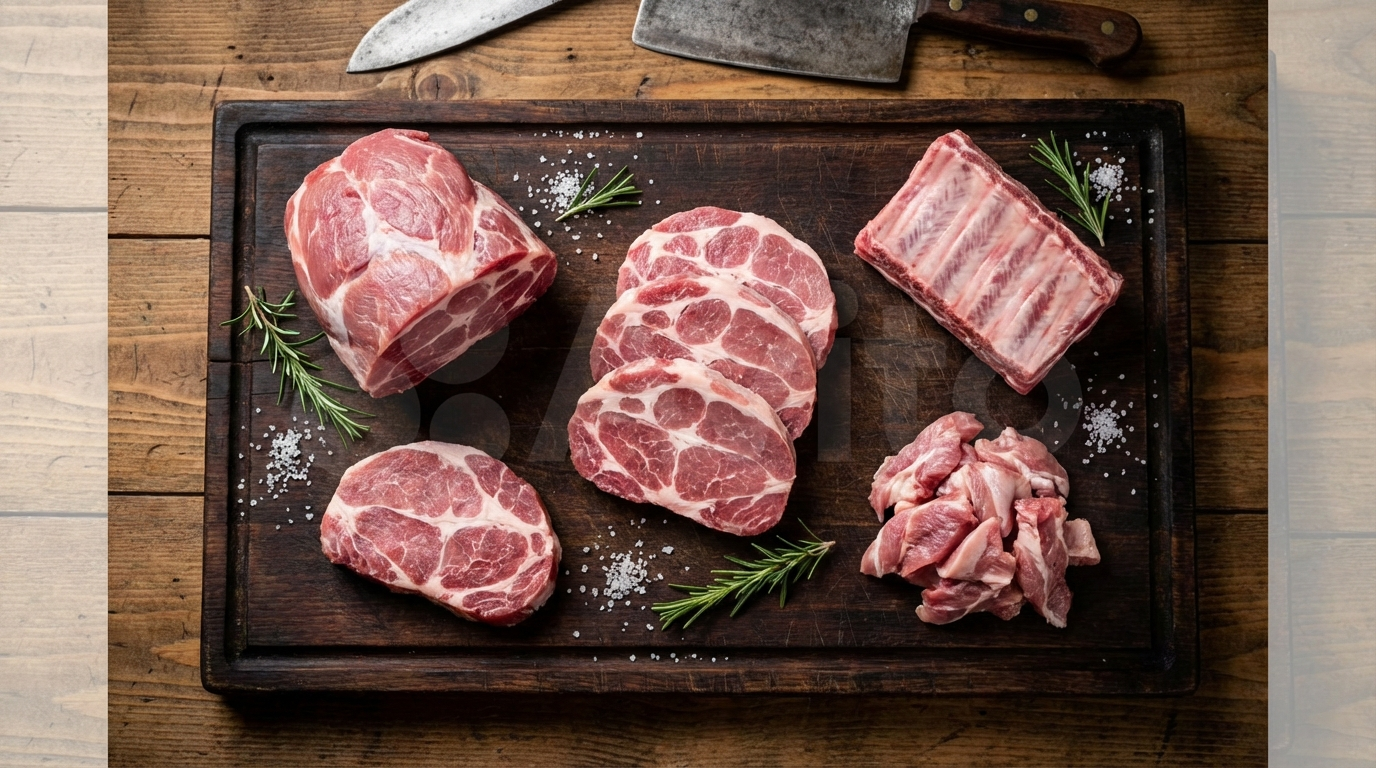
When you learn to break down a pork shoulder yourself, you unlock coppa steaks (the most marbled pork cut you can get), country-style ribs, pork steaks, stew meat, grinding trim, and yes — still plenty of meat for pulled pork or carnitas. One primal, six or more uses, at a fraction of what those individual cuts cost at the butcher counter.
This guide walks through the entire breakdown from whole bone-in shoulder to finished sub-primals, with the exact knife techniques professional butchers use every day.
Understanding Pork Shoulder Anatomy
Before you make a single cut, you need to understand what you are working with. The pork shoulder (Boston butt) comes from the upper portion of the front leg, above the picnic shoulder. Despite the name, it has nothing to do with the rear of the animal — the "butt" refers to the barrel (butt) that colonial New England butchers packed this cut into for storage and transport.
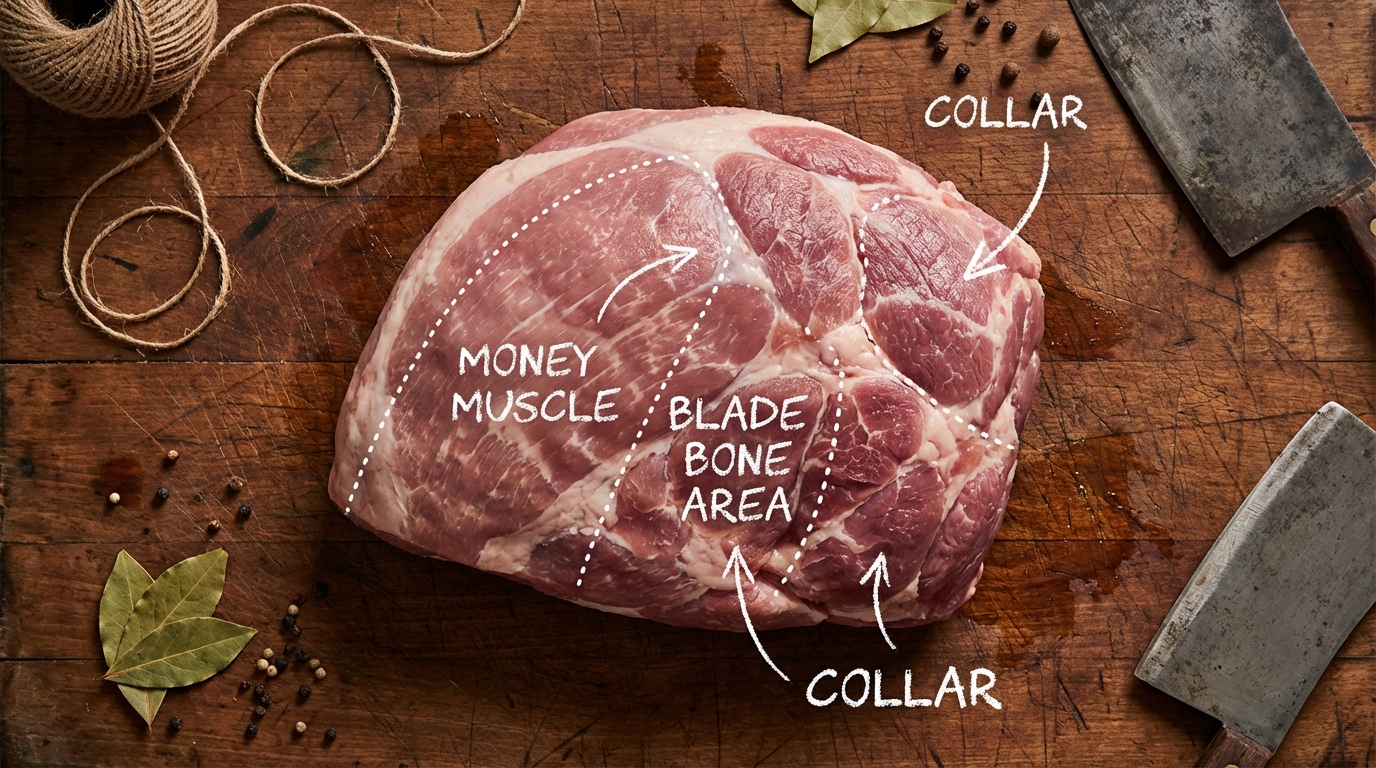
A bone-in Boston butt contains several key anatomical features:
- The Blade Bone (Scapula): A flat, paddle-shaped bone embedded in the upper portion of the shoulder. This is the primary obstacle in breaking down the cut. It connects to nothing on the outside — you can remove it entirely with careful knife work around its edges.
- The Coppa (Money Muscle): A heavily marbled cylindrical muscle that sits on top of the shoulder, running from the neck end toward the spine. In Italian butchery, this is cured into capicola. In competition barbecue, it is called the money muscle because judges prize its tenderness and fat content.
- The Main Shoulder Muscles: Several large muscle groups make up the bulk of the shoulder. These include the infraspinatus (the flat muscle below the blade bone) and the triceps group. These muscles are well-exercised, full of connective tissue, and ideal for slow cooking or grinding.
- The Fat Cap: A layer of external fat covering one side of the shoulder, typically a quarter inch to three-quarters of an inch thick. Some of this renders during cooking. The rest should be trimmed and saved for grinding into sausage.
- Intramuscular Fat: Pork shoulder is one of the most well-marbled cuts on the animal. This internal fat is what makes pulled pork so moist and coppa steaks so rich.
Pick up the shoulder and find the blade bone. Press your fingers along the surface and you will feel a hard ridge running diagonally through the upper third of the meat. That bone is your landmark for every cut that follows.
Tools You Need
Breaking down a pork shoulder requires fewer specialized tools than you might expect:
- Sharp boning knife (5-7 inches, semi-flexible): This is your primary tool. The narrow, flexible blade follows bone contours better than any other knife. If you only own one knife for butchery, make it a boning knife.
- Large cutting board (at least 18x24 inches): A whole pork shoulder takes up space. A small cutting board means the meat hangs over the edges, making clean cuts difficult and creating a safety hazard.
- Paper towels: Cold pork is slippery. Dry the surface before cutting and keep towels handy to maintain your grip throughout the process.
- Sheet trays or bowls: You will be separating the shoulder into multiple cuts and trim piles. Have containers ready so you are not stacking pieces on top of each other.
- A meat saw (optional): If you want bone-in pork steaks cut through the blade bone, you need a saw. A hand-held bone saw works fine. For boneless breakdown, you do not need one.
Temperature matters. Work with the shoulder cold, straight from the refrigerator. Cold fat and connective tissue are firm and cut cleanly. If the meat warms up during a long breakdown session, put it back in the fridge for 15 minutes before continuing.
Step 1: Remove the Blade Bone
Removing the blade bone is the most important step in the entire breakdown. Do it well and you lose almost no meat. Rush it and you leave pounds of good pork stuck to the bone.
Place the shoulder fat-cap-side down on the cutting board so the bone side faces up. You should be able to see part of the blade bone exposed at the surface — it looks like a white ridge of cartilage and bone poking through the meat near the top of the shoulder.
Start at the exposed end. Place the tip of your boning knife against the bone where it is visible. Using short, scraping strokes, cut along the flat surface of the bone. Let the blade ride against the bone — you should hear and feel the knife edge scraping against hard bone. This sound means you are in the right place. If you are cutting through soft meat, you have drifted away from the bone and are wasting product.
The blade bone has two main surfaces: a flat top and a flat bottom, connected by a thin spine running along its length. Work along the top surface first, peeling the meat back as you go. Use your non-knife hand to pull the meat away from the bone, creating tension that makes it easier to see where bone ends and meat begins.
When you reach the spine of the blade bone (the ridge running along the center), carefully cut along both sides of it. This ridge is where most people lose meat — they cut too far from the bone and leave a thick layer of pork behind.
Once the top and spine are free, flip the shoulder over and work the bottom surface the same way. Short scraping strokes, knife tip riding the bone, non-knife hand peeling meat back.
At the far end of the blade bone, you will hit a knuckle of cartilage where the bone terminates. Cut around this knuckle, and the entire blade bone should lift free. Set it aside — there is enough meat left on it to make excellent stock or to gnaw on as a cook's treat.
Common mistake: Trying to remove the bone in one dramatic pull. This is not a movie. Work slowly, making dozens of small cuts. Professional butchers who do this hundreds of times a day still use small, controlled strokes. Speed comes from precision, not force.
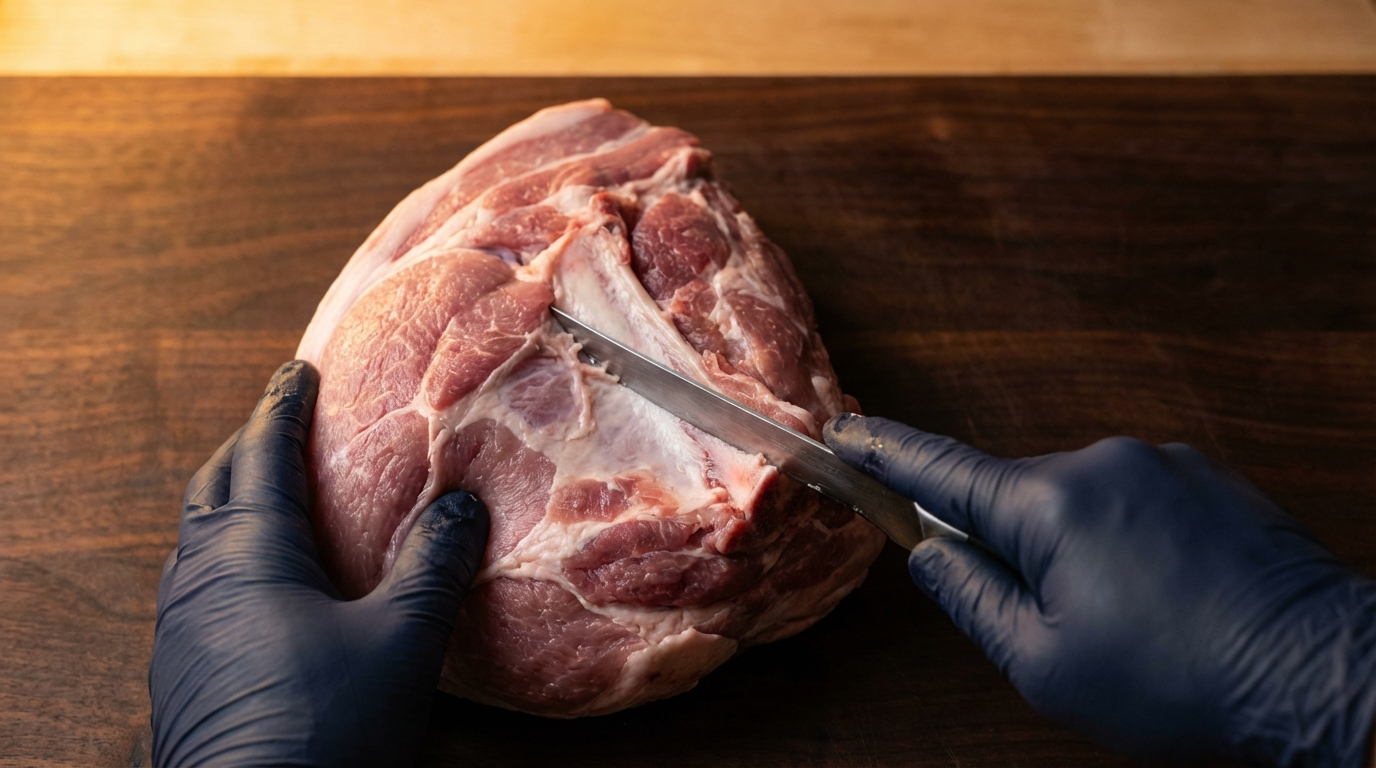
Step 2: Separate the Coppa
With the blade bone removed, you now have a boneless pork shoulder with a natural seam visible where the coppa muscle sits on top. The coppa is the cylindrical, heavily marbled muscle running along what was the top of the shoulder near the neck end.
Feel for the fat seam that separates the coppa from the main shoulder muscles below it. This seam runs roughly parallel to the fat cap surface. Insert your boning knife into this seam and follow it, letting the natural fat line guide your blade. The coppa should separate with minimal knife work — most of the division is fat and connective tissue, not solid muscle.
Once separated, the coppa is a roughly cylindrical piece weighing between one and a half to two and a half pounds. This is the most valuable cut from the entire shoulder. You have three excellent options:
- Coppa steaks: Slice the cylinder into one-inch-thick rounds. These are the most marbled pork steaks you can get — they rival ribeye beef steaks for fat content. Grill them hot and fast to medium (145°F internal) and they are extraordinary.
- Whole roast: Tie the coppa into a uniform cylinder with butcher's twine and roast it at 325°F until 145°F internal. Rest for 10 minutes and slice thin. This is essentially a pork tenderloin substitute with ten times the flavor.
- Cure it: Salt-cure and dry-age the coppa for four to eight weeks to make authentic capicola. This is a traditional Italian preparation and one of the finest cured meats in the world.
Step 3: Cut Pork Steaks and Country-Style Ribs
With the coppa removed, you are left with the main body of the shoulder — a large, roughly rectangular slab of boneless pork with multiple muscle groups visible on the cut surface.
For pork steaks: Cut the main body crosswise (perpendicular to the muscle grain) into slices one to one and a half inches thick. These are classic St. Louis-style pork steaks — a staple of Midwest grilling. Each steak will have several different muscle groups visible in cross-section, held together by connective tissue and fat seams. This is a feature, not a flaw. The varying textures and fat content create steaks with complex flavor and multiple levels of tenderness.
For country-style ribs: Instead of cutting crosswise, cut the main body lengthwise (parallel to the muscle fibers) into strips about two inches wide. These long strips of marbled pork are what grocery stores sell as boneless country-style ribs. They are excellent braised, slow-smoked, or grilled low and slow until tender.
You do not have to choose one or the other. A common approach is to cut two or three pork steaks from one end of the shoulder and then slice the remainder into country-style rib strips. Variety in your freezer is more valuable than uniformity.
The connective tissue question: You will notice white bands of connective tissue running between muscle groups. Leave them in place. Unlike beef silverskin (which stays tough no matter how you cook it), pork shoulder connective tissue breaks down into gelatin with moderate heat and time. It is what makes these cuts so moist and flavorful when braised or smoked.
Step 4: Trim, Cube, and Grind
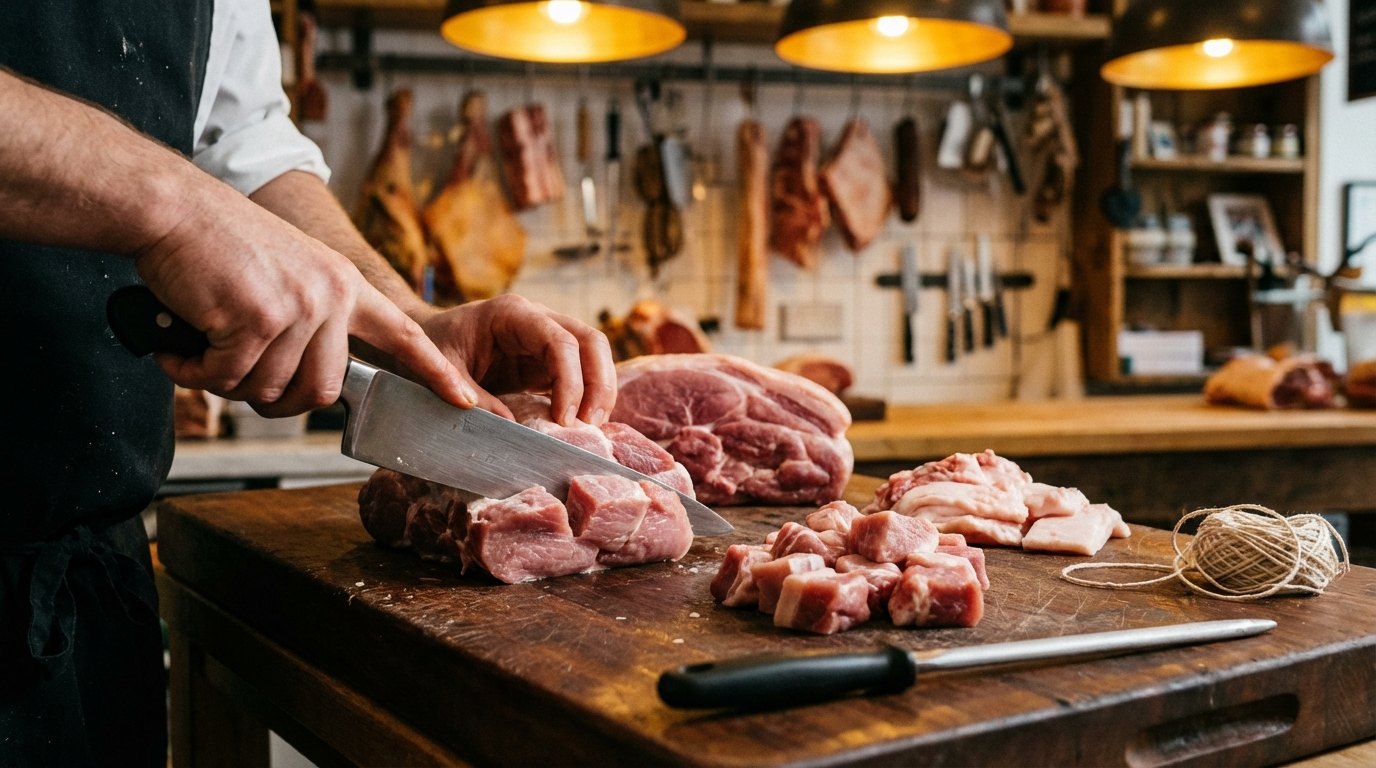
Every breakdown produces trim — odd-shaped pieces, thin flaps, and scraps that are too small or irregular for steaks or ribs. Do not throw these away. Pork shoulder trim is some of the best meat you can put through a grinder.
For stew meat: Cut trim pieces into uniform one-inch to one-and-a-half-inch cubes. Uniformity matters for even cooking. These cubes are the base for pork chili, pozole, pork stew, curry, or any braised dish. The high fat content and abundant connective tissue in shoulder meat means your stew will be rich, silky, and deeply flavored without any added fat.
For grinding: The ideal grind ratio for pork sausage is 70 to 75 percent lean meat to 25 to 30 percent fat. Pork shoulder naturally falls close to this ratio, making it the single best cut for sausage-making. Cut trim into strips that fit your grinder feed tube (usually one to two inches wide) and chill them in the freezer for 20 minutes before grinding. Cold meat grinds cleanly. Warm meat smears into paste.
For pulled pork: If you want to reserve some shoulder for classic pulled pork or carnitas, cut a two-to-three-pound chunk from the main body before portioning the rest into steaks. This piece will smoke or braise identically to a whole shoulder — the bone was never important for pulled pork. What matters is the connective tissue and fat content, and a boneless chunk has just as much as a bone-in one.
Fat cap trim: The external fat cap you removed earlier has value too. Dice it into small cubes and render it slowly in a heavy pot over low heat. Strained rendered pork fat (lard) is one of the finest cooking fats available — it makes flaky pie crusts, superb fried chicken, and the best refried beans you have ever tasted. Store rendered lard in a jar in the refrigerator for up to three months or in the freezer for a year.
Storage and Freezing
Once your shoulder is broken down into individual cuts, proper storage determines how long they stay fresh and how well they cook weeks or months later.
Refrigerator (use within 3 to 5 days): Wrap each cut tightly in plastic wrap or place in sealed containers. Keep them on the lowest shelf of your refrigerator where the temperature is coldest and most consistent. Do not stack fresh-cut pork directly on top of other foods — use a sheet tray underneath to catch any liquid.
Freezer (up to 6 months for best quality): For freezing, vacuum sealing is the gold standard. If you do not have a vacuum sealer, wrap each cut tightly in plastic wrap, then in a layer of aluminum foil, and finally place in a freezer bag with as much air removed as possible. Label every package with the cut name, weight, and date. Three months from now, you will not remember which identical-looking frozen package is coppa steaks and which is stew meat.
Portion sizing: Freeze in the portions you will actually cook. Freezing four pork steaks together when you typically cook two means you have to thaw and refreeze — which degrades texture and increases food safety risk. Think about your household size and typical meals when packaging.
Thawing: Always thaw in the refrigerator, never on the counter. A two-pound package takes roughly 24 hours to thaw in the fridge. Plan ahead. If you need faster thawing, submerge the sealed package in cold running water — never warm or hot water, which pushes the outer surface into the danger zone (40°F to 140°F) while the center is still frozen.
What to Do With Each Cut
Here is a quick reference for cooking each sub-primal you extracted from the shoulder:
- Coppa steaks (1 inch thick): Grill over direct high heat, 4 to 5 minutes per side, to 145°F internal. Rest 5 minutes. Season simply with salt and pepper — the marbling does the work.
- Pork steaks (1 to 1.5 inches): Sear in a cast iron skillet, then braise in beer, stock, or barbecue sauce at 325°F for 90 minutes until fork-tender. Or smoke at 275°F until 195°F internal for a bark-covered result.
- Country-style ribs: Low and slow is the only way. Smoke at 250°F to 275°F until probe-tender (around 200°F internal, 3 to 4 hours). Or braise in a Dutch oven at 300°F for 2.5 to 3 hours.
- Stew cubes: Brown hard in a hot pan (do not crowd), then braise in liquid at 325°F for 1.5 to 2 hours. The connective tissue needs time and moisture to convert to gelatin.
- Pulled pork chunk: Smoke at 225°F to 250°F until 203°F internal (8 to 12 hours depending on size). Rest wrapped in foil and towels for 1 hour before pulling. Or pressure cook for 90 minutes for a weeknight version.
- Ground pork: Season for breakfast sausage (sage, maple, black pepper), Italian sausage (fennel, red pepper flakes, garlic), or use as-is for meatballs, meatloaf, dumplings, and stir-fry.
- Rendered lard: Use for pie crusts, biscuits, frying, sautéing, or seasoning cast iron. Substitute 1:1 for any recipe calling for shortening.
Frequently Asked Questions
Frequently Asked Questions
What is the difference between a pork shoulder and a Boston butt?
They are the same cut. Boston butt is the industry and retail name for the upper portion of the pork shoulder (the blade shoulder). The lower portion, which includes the foreleg and shank, is called the picnic shoulder. When a recipe or store label says pork shoulder or Boston butt, they mean the same rectangular, well-marbled primal from the upper front quarter of the hog.
Can I break down a pork shoulder without a boning knife?
You can, but a boning knife makes the job significantly easier and wastes less meat. The narrow, flexible blade follows the contours of the blade bone precisely. If you must substitute, use the sharpest knife you own with the thinnest blade. A chef's knife works in a pinch but its width makes it harder to navigate around the bone. A paring knife is too short for the larger cuts but works for detail work around the bone.
How much usable meat do I get from a whole pork shoulder?
A bone-in pork shoulder typically yields 85 to 90 percent usable meat by weight. From a 9-pound shoulder, expect roughly 1 to 1.5 pounds of bone, 0.5 to 1 pound of external fat cap (which you can render into lard), and 7 to 7.5 pounds of boneless meat divided between coppa, steaks, country-style ribs, stew cubes, and grinding trim.
Should I buy bone-in or boneless pork shoulder?
Buy bone-in. It is almost always cheaper per pound, and removing the blade bone yourself takes only 5 to 10 minutes with practice. The bone also gives you a bonus ingredient for stock. Boneless pork shoulders have already had the bone removed at the packing plant, but you pay a premium for that convenience and lose the bone for stock.
What is the coppa and why is it special?
The coppa (also called the money muscle in barbecue competition) is a heavily marbled cylindrical muscle sitting on top of the pork shoulder near the neck end. It has more intramuscular fat than any other pork cut, making it exceptionally tender and flavorful when grilled as steaks or roasted whole. In Italian charcuterie, it is salt-cured and aged to make capicola, one of the most prized cured meats.
More Expert Guides
How to Trim a Brisket: The Complete Butcher's Guide
Proper brisket trimming is the difference between a backyard experiment and competition-quality results. Here is the professional technique for shaping a whole packer brisket before it ever touches the smoker.
14 min readHow to Butcher a Whole Chicken: Step-by-Step Guide
Breaking down a whole chicken yourself saves 40-50% compared to buying individual parts. Here is the professional technique for turning one bird into perfectly portioned pieces.
14 min readHome Butchering Safety Guide: Essential Protocols for Safe Meat Processing
Learn professional butchering safety protocols from a master butcher with 25+ years of experience. Essential guidance for anyone processing meat at home.