How to Break Down a Whole Turkey: Professional Butcher's Guide
Roasting a whole turkey is tradition. But tradition does not always produce the best results. White meat dries out while dark meat finishes cooking. The legs take longer than the breast. The wings burn. And carving at the table turns into a performance nobody asked for.
Breaking down a turkey before cooking solves every one of these problems. Each piece cooks at its ideal temperature. Dark meat braises while breast meat roasts. Wings crisp perfectly. And you get a carcass for stock before dinner even starts.
I have broken down hundreds of turkeys during my years in the trade, and the technique is nearly identical to breaking down a chicken — just scaled up. If you have broken down a chicken before, you already know 90% of what you need. If you have not, this guide walks through every cut.

Why Break Down a Turkey Instead of Roasting Whole
The argument for breaking down your turkey is practical, not just technique for technique's sake:
- Even cooking: Turkey breast reaches safe temperature (165°F) long before thighs do (which taste best at 175-180°F). Separated pieces cook to their ideal doneness independently.
- Faster cooking: Individual pieces cook in 60-90 minutes total. A whole 14-pound turkey takes 3-4 hours.
- Better browning: More exposed surface area means more crispy skin across every piece.
- Stock advantage: The backbone and carcass go into stock immediately. You can have turkey stock simmering while the pieces roast.
- Easier storage: Broken-down pieces stack flat in the refrigerator. No need to clear an entire shelf for a whole bird.
- Cost savings: Whole turkeys cost $1.50-$3 per pound. Turkey breast alone runs $5-$8 per pound. Breaking down a whole bird yourself saves 40-60%.
What You Need
Tools
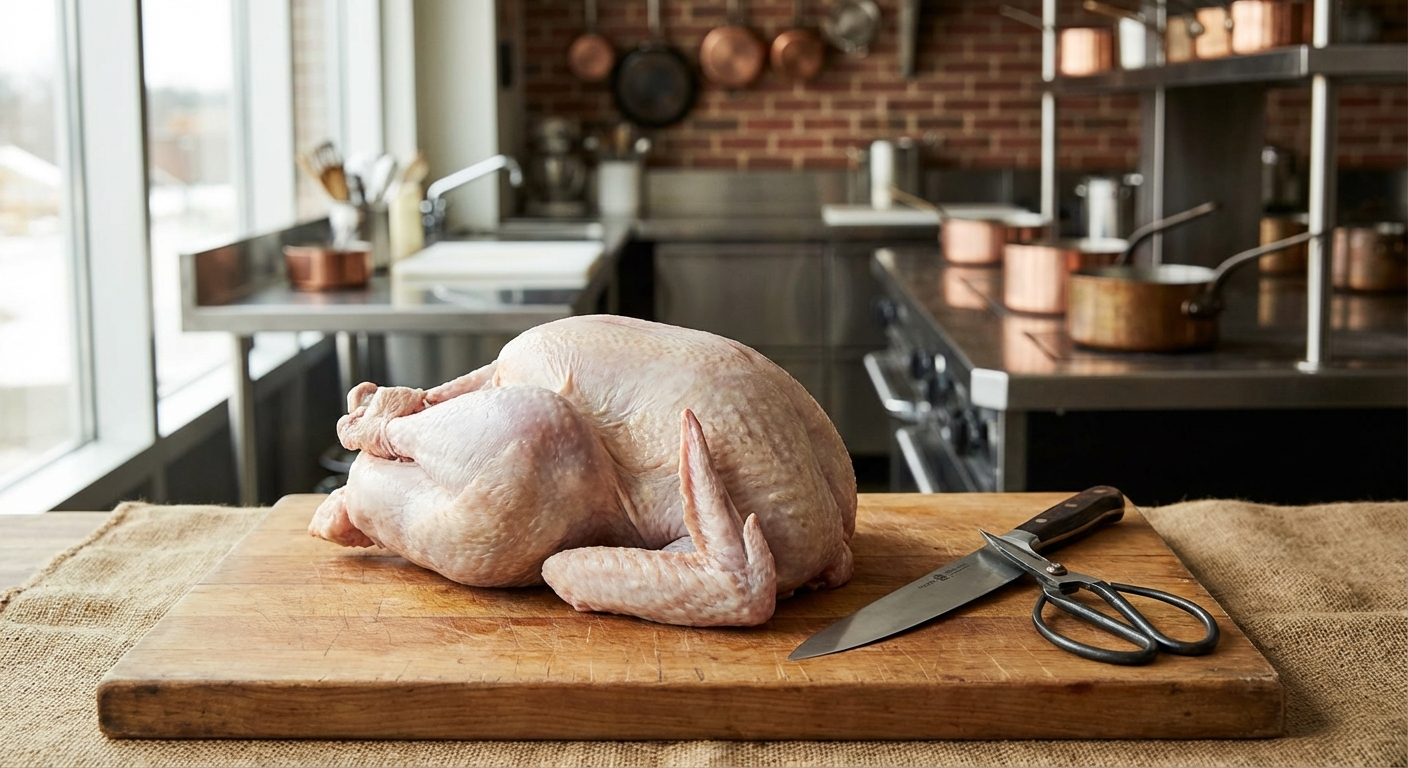
- Sharp chef's knife (8-10 inches): A longer blade helps with turkey because the bird is substantially larger than a chicken. A sharp edge is non-negotiable — dull knives slip on skin and require dangerous force.
- Boning knife (5-7 inches, optional): Useful for working around joints and along the breastbone. Not required but makes precision work easier.
- Kitchen shears or poultry shears: Essential for cutting through the backbone. Turkey backbone is significantly thicker than chicken — shears save time and effort compared to a knife.
- Large cutting board (at least 20x15 inches): Turkey requires more workspace than chicken. Place a damp towel underneath to prevent sliding.
- Paper towels: For drying the bird and maintaining grip. Wet turkey skin is dangerously slippery.
- Sheet pan or roasting pan: For collecting pieces as you work.
The Turkey
Start with a whole turkey, 12-20 pounds. Fresh is ideal but frozen works — the turkey must be fully thawed. A partially frozen turkey is nearly impossible to break down safely. Allow 24 hours of refrigerator thawing per 4-5 pounds of bird.
Remove the neck and giblet bag from the body cavity and the neck cavity (check both). Save these for stock or gravy. Pat the turkey thoroughly dry with paper towels. Remove it from the refrigerator 20-30 minutes before breaking it down — a slightly warmer bird is easier to work with.
Understanding Turkey Anatomy
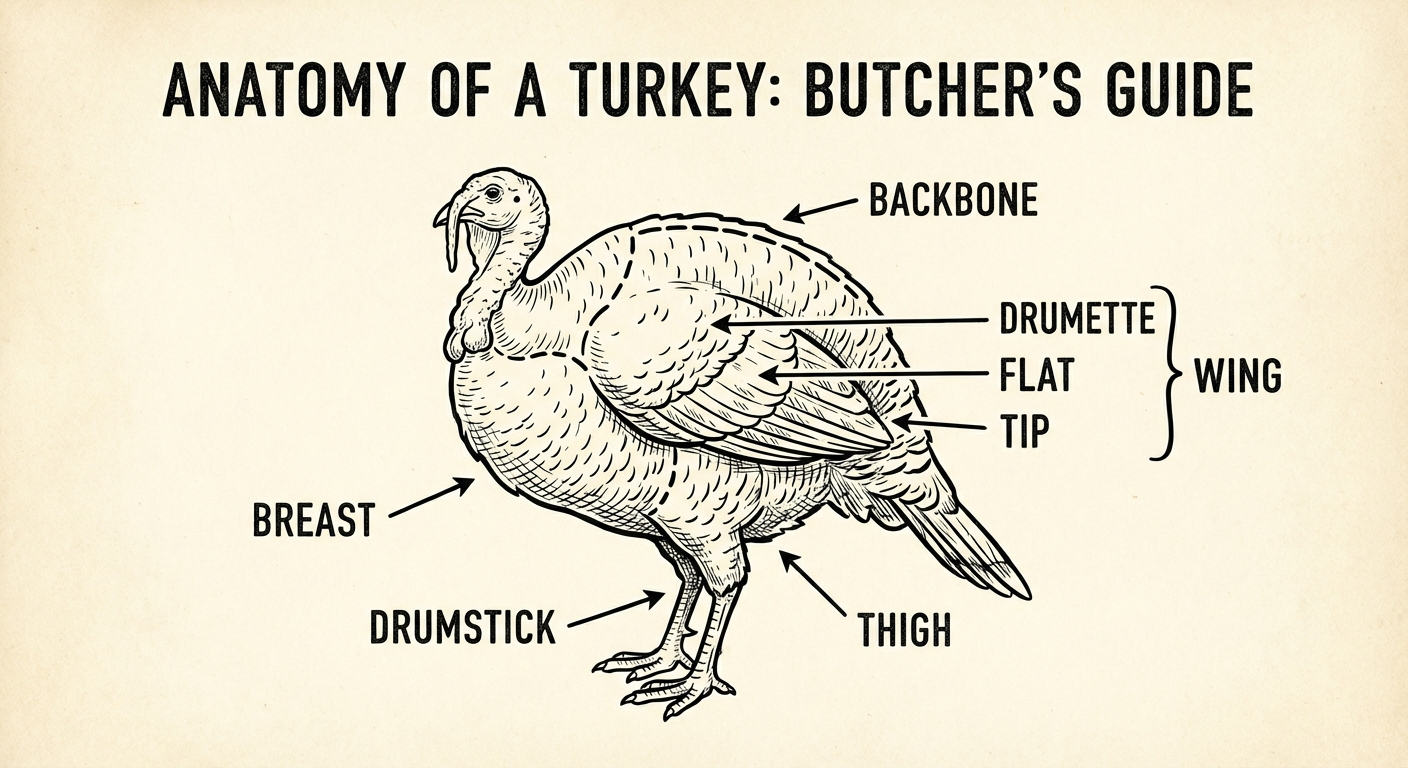
Turkey anatomy mirrors chicken anatomy at a larger scale. Before making any cuts, understand the structure:
- 2 leg quarters — each consisting of a drumstick and thigh connected at the knee joint
- 2 wings — connected at the shoulder joint, each with three sections (drumette, flat, tip)
- 2 breast halves — large muscles running along each side of the keel bone (breastbone)
- 1 backbone — the spine running the full length of the bird
- 1 wishbone — Y-shaped bone at the front of the breast cavity
The fundamental principle is the same as with any poultry: you cut through joints, not through bone. Every joint connects with cartilage and tendons. When you find the right spot, the knife passes through with minimal resistance. If you feel solid bone, reposition. You are looking for the soft gaps between bones.
The main difference with turkey is scale. Turkey joints are larger and tougher. Tendons are thicker. The breastbone is more prominent. But the anatomy is identical — if you can find a joint on a chicken, you can find the same joint on a turkey.
Step 1: Remove the Leg Quarters
Place the turkey breast-side up on your cutting board. Start with the legs — they are the easiest pieces to remove and give you more room to work on the rest of the bird.
- Expose the joint: Pull one leg away from the body. Slice through the skin connecting the thigh to the breast. Cut skin only at this stage.
- Find the hip joint: Continue pulling the leg away from the body while cutting through the meat between thigh and breast. Bend the leg back firmly until you feel the thighbone pop out of the hip socket. On a turkey, this requires more force than a chicken — do not hesitate to use both hands.
- Cut through the joint: Once the joint is dislocated, slice through the exposed cartilage. Your knife should pass through without hitting bone.
- Capture the oyster: Follow the curve of the backbone with your blade to remove the "oyster" — the small, round piece of dark meat nestled against the spine. This is the most flavorful bite on the bird. Scrape along the backbone to capture it with the leg quarter.
Repeat on the other side. You now have two leg quarters and a turkey with wings and breast attached to the carcass.
Step 2: Separate Drumsticks from Thighs
Lay each leg quarter skin-side down on your board. Locate the knee joint — it sits at a visible fat line running between the drumstick and thigh.
- Find the joint line: Flex the leg quarter at the knee. Watch where it bends — that is your cut line.
- Cut through: Place your knife on the fat line and cut down firmly. The blade should pass between the two bones through cartilage.
- Adjust if needed: Turkey knee joints are larger than chicken joints. If you hit bone, rock the blade slightly forward or back until you find the gap. It is always there.
You now have 2 drumsticks and 2 thighs. Turkey drumsticks are large enough to serve one person each. Thighs are even more generous.
Step 3: Remove the Wings
Return to the breast-and-carcass piece. Work with it breast-side up.
- Locate the shoulder: Pull one wing away from the body to expose the shoulder joint. On turkey, this joint sits deeper than on chicken.
- Cut through skin and meat: Slice through the skin around the wing joint. Pull the wing back to pop the shoulder joint.
- Sever the joint: Cut through the exposed cartilage to remove the wing completely.
Repeat on the other side. For turkey wings, consider further breaking each wing into sections:
- Drumette: The meaty upper section — great for roasting or frying.
- Flat (wingette): The middle section with two parallel bones — good for stock or crispy roasting.
- Tip: Minimal meat — save for stock.
Separate these by cutting through each wing joint the same way: flex to find the gap, cut through cartilage.
Step 4: Remove the Backbone
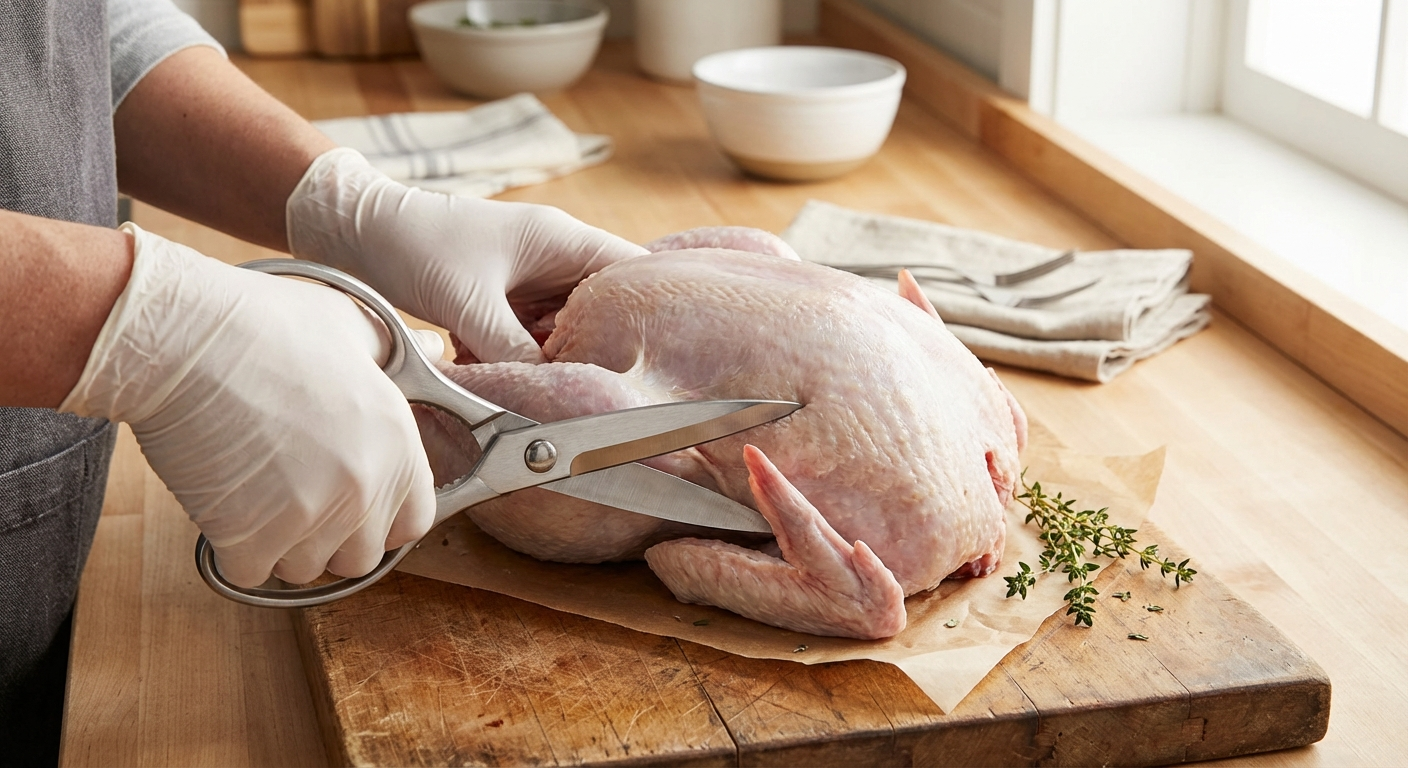
This is where kitchen shears earn their place. The turkey backbone is thick and tough — cutting through the ribs on either side with a knife works but is slow and imprecise.
- Flip the carcass: Turn the remaining breast piece backbone-up (skin side down).
- Cut along one side of the backbone: Starting at the tail end, cut through the ribs along one side of the spine with shears. Stay close to the backbone — you want to leave as much meat on the breast as possible.
- Cut along the other side: Repeat on the opposite side of the backbone.
- Remove the backbone: It should come free as one piece. Set it aside for stock.
The backbone contains very little meat but creates incredibly rich stock. Combined with the wing tips, neck, and giblets, you have the foundation for outstanding turkey stock or gravy.
Step 5: Split or Debone the Breast
You now have a boneless-looking breast piece (still on the bone, with the keel bone running down the center). You have two options:
Option A: Split Into Two Bone-In Breast Halves
- Place the breast skin-side down on your cutting board.
- Score along one side of the keel bone (the cartilage ridge running down the center) with your knife.
- Use firm pressure to cut through the cartilage and split the breast into two halves.
- Alternatively, use shears to cut through the keel bone — faster and cleaner on turkey.
Bone-in breast halves roast beautifully. The bone insulates the meat, promoting more even cooking and better moisture retention.
Option B: Remove the Breast Meat Entirely (Boneless)
- Place the breast skin-side down. Locate the keel bone ridge in the center.
- Score along one side of the keel bone with a boning knife or the tip of your chef's knife.
- Keeping your blade against the bone, make long sweeping strokes to separate the breast meat from the rib cage. Let the bone guide your knife.
- When you reach the outer edge, the breast half will come free in one piece with the skin attached.
- Repeat on the other side.
Boneless breast is ideal for slicing into cutlets, rolling into a roulade, or portioning for precise cooking. The leftover rib cage goes straight into stock.
Step 6: Use Everything
A professional butcher wastes nothing. Here is what to do with every piece:
| Piece | Best Use | Notes |
|---|---|---|
| Drumsticks (2) | Braise, roast, smoke | Best at 175-180°F internal. Braising tenderizes the connective tissue. |
| Thighs (2) | Braise, roast, confit | The most flavorful cut. Confit at 275°F for 2.5-3 hours. |
| Breast halves (2) | Roast, sous vide, slice into cutlets | Pull at 160°F, rest to 165°F. Overcooking is the biggest risk. |
| Wing drumettes (2) | Roast, fry, braise | Enough meat to serve as appetizers or snacks. |
| Wing flats (2) | Roast, stock | Crisp at high heat (425°F) for crispy skin. |
| Wing tips (2) | Stock only | No usable meat. Excellent collagen for stock body. |
| Backbone | Stock | Roast at 400°F for 30 min before simmering for deeper flavor. |
| Neck | Stock, braised | Full of collagen. Some butchers braise neck for pulled meat. |
| Giblets | Gravy, stock, pâté | Liver for pâté. Heart and gizzard into stock or chop for gravy. |
| Carcass (ribs) | Stock | If deboning breast, the rib cage adds body to stock. |
Common Mistakes and How to Avoid Them
- Forcing through bone: If your knife meets hard resistance, stop. Reposition and find the joint gap. Turkey bones are large — you will not accidentally cut through them, and trying to force it risks injury.
- Wet bird: Always pat dry. Wet skin is slippery, and slippery means less knife control. This is a safety issue, not just technique.
- Dull knife: A dull knife requires more pressure, which means less control. Sharpen or hone your knife before starting. One pass on a honing steel takes 30 seconds and dramatically improves performance.
- Working too fast: Speed comes from practice, not from rushing. Each cut should be deliberate. Professional speed is a byproduct of knowing the anatomy, not of moving the knife faster.
- Skipping the wishbone: Before removing the breast, consider removing the wishbone first. Pull back the skin at the neck end of the breast, locate the Y-shaped bone, and scrape along it with your knife to free it. This makes breast removal cleaner and carving easier.
- Discarding the backbone and trimmings: The bones and scraps are half the value of a whole turkey. A broken-down turkey carcass makes 2-3 quarts of rich stock — worth $10-$15 if purchased.
Storing Broken-Down Turkey
Once broken down, you have flexibility:
- Cook immediately: Season and cook each piece to its ideal temperature.
- Refrigerate (1-2 days): Place pieces on a sheet pan lined with paper towels, uncovered. This dries the skin for better browning — a technique called dry brining the surface.
- Freeze (up to 6 months): Wrap each piece tightly in plastic wrap, then foil, then into a freezer bag. Squeeze out air. Label with date and cut name. Frozen turkey pieces thaw faster than a whole bird — thighs and drumsticks thaw overnight in the refrigerator.
One of the biggest advantages of breaking down a turkey is the ability to cook different pieces on different days. Roast the breast for Sunday dinner. Braise the legs on Tuesday. Make stock from the carcass Wednesday. A single turkey feeds a household for most of a week.
Frequently Asked Questions
Frequently Asked Questions
How long does it take to break down a whole turkey?
For a first attempt, allow 20-30 minutes. With practice, the entire breakdown takes 10-15 minutes. The process is identical to breaking down a chicken, just with larger joints and more meat to navigate.
What size turkey is easiest to break down?
A 12-14 pound turkey is the most manageable size for home butchering. Larger birds (18-20+ pounds) have thicker joints and heavier pieces that require more force and a larger workspace. Start smaller and scale up as you build confidence.
Can I break down a frozen turkey?
No. The turkey must be fully thawed. A partially frozen bird is extremely difficult to cut safely — the joints will not flex, the knife will slip on icy surfaces, and you cannot feel the anatomy through frozen tissue. Allow 24 hours of refrigerator thawing per 4-5 pounds.
Do I need a special knife for turkey?
A sharp 8-10 inch chef knife handles every step. A boning knife helps with precision work around joints but is not required. Kitchen shears are highly recommended for cutting through the backbone — this is the one step where shears significantly outperform a knife.
Is it cheaper to buy a whole turkey and break it down?
Significantly cheaper. Whole turkeys cost $1.50-$3 per pound, while individual turkey parts cost $4-$8 per pound. A 14-pound whole turkey at $2/pound costs $28. Buying the same amount of meat as individual parts would cost $60-$80. Plus you get bones for stock worth another $10-$15.
What do I do with the turkey carcass after breaking it down?
Make stock. Roast the backbone, wing tips, and neck at 400°F for 30 minutes, then simmer with water, onion, celery, carrot, and herbs for 4-6 hours. Strain and you have rich turkey stock for soups, gravy, and risotto. Freeze in 2-cup portions for up to 6 months.
More Expert Guides
How to Trim a Brisket: The Complete Butcher's Guide
Proper brisket trimming is the difference between a backyard experiment and competition-quality results. Here is the professional technique for shaping a whole packer brisket before it ever touches the smoker.
14 min readHow to Butcher a Whole Chicken: Step-by-Step Guide
Breaking down a whole chicken yourself saves 40-50% compared to buying individual parts. Here is the professional technique for turning one bird into perfectly portioned pieces.
14 min readHome Butchering Safety Guide: Essential Protocols for Safe Meat Processing
Learn professional butchering safety protocols from a master butcher with 25+ years of experience. Essential guidance for anyone processing meat at home.