How to Process a Whole Deer: Complete Field-to-Freezer Guide
How to Process a Whole Deer: Complete Field-to-Freezer Guide
Every hunting season, thousands of deer end up at commercial processors where you pay three to five dollars per pound and get back generic packages of ground meat that barely resemble the animal you harvested. Processing your own deer changes everything. You control the cuts, the trim ratio, the aging time, and the final product — and you save two hundred to four hundred dollars per animal in processing fees.
A whole white-tailed deer typically yields 50 to 70 pounds of boneless meat from a field-dressed carcass weighing 120 to 160 pounds. That is enough backstrap steaks, roasts, stew meat, and ground venison to fill a chest freezer and feed a family for months. The work takes four to six hours for a beginner, and with practice you can break down a deer in under three hours.
This guide walks through the complete process: field dressing, skinning, aging, breaking down into primals, and fabricating retail cuts. Whether this is your first deer or your fiftieth, there is something here to improve your process.
Equipment You Need
Deer processing does not require expensive equipment. Most of what you need fits in a small toolbox.
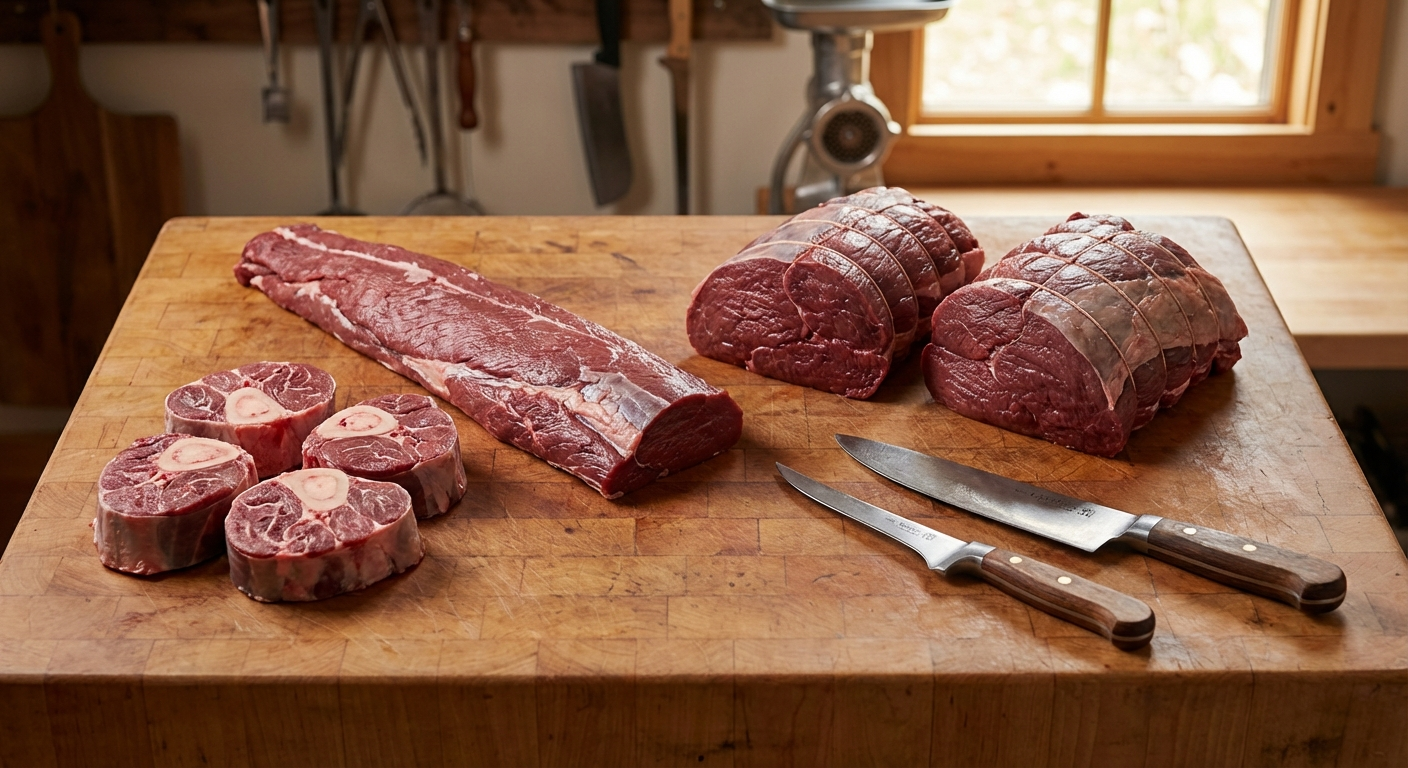
Essential Knives
- 6-inch boning knife (semi-flexible): Your most-used knife. The Victorinox Fibrox Pro is the industry standard at around thirty dollars. You will use this for 80 percent of the work — deboning hindquarters, removing silverskin, separating muscle groups.
- 10-inch breaking knife or cimeter: For long cuts along the backstrap and separating large muscle groups. The curved belly makes sweeping cuts through the loin effortless.
- 3-4 inch skinning knife: Short, stiff blade with a rounded belly for separating hide from meat without puncturing either.
Other Equipment
- Honing steel: Use every 15 minutes during processing. A sharp knife is the difference between clean cuts and ragged tears.
- Large HDPE cutting board: At least 18 by 24 inches. Commercial restaurant supply boards cost 20 to 25 dollars and last for years.
- Gambrel and hoist or sturdy tree branch: For hanging the deer during skinning. A gambrel with a come-along winch makes life much easier.
- Meat grinder: A number 8 or number 12 electric grinder handles trim efficiently. Keep all parts cold.
- Vacuum sealer: Essential for preventing freezer burn. Properly sealed venison lasts 12 to 18 months in the freezer.
- Game bags: Cheesecloth or dedicated game bags protect the carcass during transport and aging.
- Nitrile gloves and cut-resistant glove: Hygiene and safety basics.
Step 1: Field Dressing
Field dressing should happen within 30 minutes of the kill. The goal is removing the internal organs to begin cooling the carcass and prevent bacterial growth from the gut contents.
The Process
- Position the deer on its back on a slight incline with the head uphill if possible. Spread the hind legs apart for access.
- Make the initial cut at the base of the sternum (breastbone). Pinch the skin and abdominal wall away from the organs and make a small incision through the skin and muscle only. You want to avoid puncturing the stomach or intestines.
- Extend the cut downward toward the pelvis. Use two fingers in a V shape straddling the blade to guide it and keep the intestines pushed down and away from the edge. Cut through skin and abdominal wall only.
- Free the diaphragm — the thin muscle sheet separating the chest cavity from the abdomen. Cut it free along its attachment to the rib cage on both sides.
- Reach into the chest cavity and sever the esophagus and trachea as far forward as you can reach. This frees the heart and lungs.
- Roll the deer to one side and let the organs fall out by gravity, cutting any remaining connective tissue attachments. The entire gut pile should come out in one mass.
- Split the pelvis if you want to remove the bladder and lower intestine cleanly. A sturdy knife or hatchet works. Cut around the anus to free the lower intestine.
- Prop the cavity open with a stick to promote air circulation during transport.
Save the heart and liver if you plan to eat them. The heart is excellent sliced thin and pan-fried. The liver should be soaked in milk or buttermilk overnight to mellow its flavor.
Step 2: Cooling and Transport
Heat is the enemy of meat quality. Your priority after field dressing is getting the carcass temperature below 40 degrees Fahrenheit as quickly as possible.
- In cold weather (below 40°F): The ambient temperature does the work. Hang the deer in shade with the cavity open. Air circulation is more important than anything.
- In warm weather (above 50°F): Get the deer to refrigeration quickly. Fill the cavity with bags of ice for transport. Consider quartering in the field and putting the quarters directly into coolers with ice.
- Transport: Keep the carcass off hot truck beds. Use a tarp underneath and keep the tailgate down for airflow. Drive directly to your processing location.
Step 3: Skinning
Skinning is easiest with the deer hanging from a gambrel by the hind legs. Gravity helps pull the hide away from the meat as you work downward.
Hanging Method
- Hang the deer by the hind legs using a gambrel inserted between the tendon and bone on each hind leg just above the hock joint.
- Make circular cuts around each hind leg just below the gambrel. Cut through the skin only, not into the meat.
- Connect the circular cuts with a straight cut down the inside of each hind leg to the original belly incision.
- Begin peeling the hide downward. Use your fist between the hide and meat, punching downward to separate them. The hide should peel away with moderate effort. Use the skinning knife only where the hide sticks — along the spine, around the front shoulders, and at the neck.
- Work around the front legs by making circular cuts at the knee joints and connecting cuts down the inside of each leg.
- Continue pulling the hide down over the neck and sever it at the base of the skull.
Tip: A clean, hair-free carcass produces better-tasting meat. If hair gets on the meat, wipe it off immediately with a damp cloth rather than trying to rinse it — water spreads loose hair everywhere.
Step 4: Aging (Optional but Recommended)
Aging venison improves tenderness and flavor dramatically. Fresh venison is tougher and has a stronger metallic taste compared to properly aged meat.
Wet Aging
The simplest method for home processors. After breaking the deer into quarters or large primals, vacuum seal them and refrigerate at 34 to 38 degrees for 5 to 7 days. The enzymes naturally present in the meat break down muscle fibers and connective tissue. This is the same process used for commercial beef.
Dry Aging
Hang the whole skinned carcass or bone-in quarters in a dedicated refrigerator at 34 to 38 degrees with a small fan for air circulation. Age for 7 to 14 days. Dry aging concentrates flavor and tenderizes, but you lose some weight to moisture evaporation and need to trim the dried exterior.
Temperature is critical. Above 40 degrees, bacteria multiply rapidly. Below 32 degrees, the aging enzymes slow to near zero. The sweet spot is 35 to 37 degrees.
Step 5: Breaking Down into Primals
A deer has the same basic muscle structure as any ruminant. Once you understand where the primals are, the knife work follows logically.
The Major Primals
- Backstraps (loins): The two long muscles running along either side of the spine on the outside. This is the most prized cut — the equivalent of a beef ribeye and strip loin combined.
- Tenderloins: Two small, tender muscles on the inside of the spine in the abdominal cavity. Smaller than backstraps but even more tender. If you did not remove these during field dressing, do it now.
- Hindquarters: The large muscle mass of the rear legs. Contains the top round, bottom round, eye of round, and sirloin tip — your roasts and steaks.
- Front shoulders: More connective tissue and sinew than the hindquarters. Best for stew meat, ground venison, or slow-cooked roasts.
- Neck: Dense, tough meat loaded with connective tissue. Excellent for ground venison, osso buco-style braising, or slow-cooked pulled venison.
- Ribs and flank: Thin meat between the ribs and along the belly. Usually trimmed for grinding, though the ribs can be smoked or braised.
- Shanks: The lower leg portions. Tough and sinewy but exceptional when braised for several hours. Venison osso buco is worth the effort.
Step 6: Removing the Backstraps
Start here — backstraps are the easiest primal to remove and the most satisfying.
- Locate the spine. The backstrap runs from the hip bone to the base of the neck along either side of the vertebral column.
- Make a long cut right against the spine from hip to neck, pressing the blade against the spinous processes (the bony ridges sticking up from each vertebra). Cut deep — the backstrap is thicker than you expect, especially through the loin section.
- Make a second cut along the transverse processes — the bony wings sticking out sideways from each vertebra. You are freeing the bottom edge of the backstrap.
- Peel the backstrap away from the spine, using short strokes to free it from the bone. Work slowly and stay against the bone to avoid leaving meat behind.
- Trim any silverskin — the iridescent membrane covering parts of the muscle. Slide the tip of your boning knife under the silverskin and angle the blade slightly upward while pulling the membrane with your other hand. The membrane should peel away cleanly.
Each backstrap yields 2 to 4 pounds of boneless meat depending on the deer's size. Cut into 1 to 1.5 inch medallions for pan-searing, or leave whole for roasting.
Step 7: Removing the Hindquarters
The hindquarters contain the most meat and the most versatile cuts.
- Locate the ball-and-socket hip joint where the femur meets the pelvis. Flex the hind leg outward to expose the joint.
- Cut through the muscle and connective tissue around the hip joint. Once you can see the ball joint, sever the ligament holding the ball in the socket.
- Follow the pelvic bone with your knife, freeing the meat from the pelvis. The hindquarter should come away as one large piece with the femur still inside.
Deboning the Hindquarter
With the hindquarter on your cutting board, you can separate it into four distinct muscles:
- Top round: The large, flat muscle on the inside of the leg. Follow the natural seam separating it from the other muscles. This is your best roast — cook to 130 degrees internal for medium-rare.
- Bottom round: On the outside of the leg, opposite the top round. Slightly tougher, excellent for jerky, thin-sliced steaks, or braising.
- Eye of round: A small, cylindrical muscle nestled between the top and bottom round. Very lean, best for jerky or thin-sliced sandwich meat.
- Sirloin tip: Located at the top of the hindquarter near the hip. Good for roasting or cubing for stew.
Follow the natural seams between muscle groups. Venison muscles separate more cleanly than beef because there is less intramuscular fat holding them together. Where you see white connective tissue between two muscles, that is your separation line.
Step 8: Removing the Front Shoulders
Unlike the hindquarters, the front shoulders are not attached to the skeleton by a ball joint. They are held in place entirely by muscle and connective tissue, which makes removal easier.
- Lift the front leg away from the ribcage. You will see a natural gap between the shoulder blade and the ribs.
- Cut through the muscle connecting the shoulder to the body, following the natural separation. The entire front leg and shoulder blade should come free with just knife work — no bone sawing required.
- Separate the shank (lower leg) at the elbow joint by cutting through the tendons and popping the joint.
Front shoulder meat has more connective tissue and irregular muscle shapes than the hindquarter. Most home processors trim the shoulders into stew-sized cubes or grind them entirely. If you want to roast a shoulder whole, wrap it in foil and cook low and slow at 275 degrees for three to four hours.
Step 9: Trimming the Neck, Ribs, and Flank
After removing the backstraps, hindquarters, and shoulders, the remaining carcass still holds usable meat.
- Neck meat: Cut away all the meat clinging to the neck vertebrae. It comes off in irregular pieces. All of this goes into the grind pile.
- Rib meat: Strip the meat from between and over the ribs. Thin and tough, but fine for grinding. Alternatively, saw the rib sections into racks and smoke them low and slow — venison ribs will not win any competitions against pork ribs, but they are surprisingly good with a vinegar-based mop sauce.
- Flank and belly: Thin sheets of meat from the abdominal area. Grind pile.
- Shanks: Save these whole for braising. Venison shanks, braised for three hours with red wine, root vegetables, and herbs, rival any expensive restaurant dish.
Step 10: Grinding
Expect 40 to 50 percent of your total boneless yield to end up as ground venison. This is normal. Venison shoulders, neck, flank, and miscellaneous trim all go into the grinder.
Fat Ratios
Venison is extremely lean — typically 2 to 3 percent fat compared to 15 to 20 percent for beef. Pure ground venison makes dry, crumbly burgers and sausage. You have two options:
- Add pork fat or beef suet: Mix 15 to 20 percent fat by weight into your grind. Pork fatback from any butcher counter costs a few dollars per pound and transforms ground venison into something that holds together on the grill and has real juiciness. For every 4 pounds of venison trim, add 1 pound of pork fat.
- Add pork shoulder: A whole bone-in pork shoulder from the grocery store (usually under two dollars per pound) gives you both fat and meat. Mix at a 70-30 or 80-20 venison-to-pork ratio.
Grinding Tips
- Keep everything cold. Partially freeze the meat and fat cubes for 30 minutes before grinding. Cold meat grinds cleanly. Warm meat smears into mush.
- Grind twice for burgers: First through the coarse plate (3/8 inch), then through the fine plate (3/16 inch).
- Grind once for chili and stews: Coarse grind only gives better texture in cooked dishes.
- Mix fat in before grinding: Cut venison and fat into similar-sized cubes, toss together, then feed through the grinder. This ensures even distribution.
Step 11: Packaging and Freezing
Proper packaging is what separates venison that tastes great in July from venison with freezer burn by March.
- Vacuum seal everything. No exceptions. The investment in a vacuum sealer pays for itself with the first deer. Properly vacuum-sealed venison lasts 12 to 18 months in the freezer with no quality loss.
- Label every package with the cut name, date processed, and weight. You will thank yourself in six months when you are staring at a freezer full of identical-looking packages.
- Package in meal-sized portions. Ground venison in 1-pound packages. Steaks in pairs. Roasts individually. This prevents thawing more than you need.
- Double seal the edges if your vacuum sealer allows it. Bone ends and sharp edges can puncture a single seal.
- Freeze flat when possible. Flat packages stack efficiently, freeze faster, and thaw faster.
Expected Yield from a Whole Deer
A 150-pound field-dressed white-tailed deer typically yields:
- Backstraps: 4 to 8 pounds (2 to 4 pounds each)
- Tenderloins: 1 to 2 pounds total
- Hindquarter roasts and steaks: 16 to 22 pounds
- Front shoulder meat: 10 to 14 pounds
- Neck, rib, flank trim: 8 to 12 pounds
- Shanks: 3 to 5 pounds
- Total boneless yield: 50 to 65 pounds (roughly 40 to 45 percent of field-dressed weight)
Of that total, 20 to 30 pounds typically becomes steaks and roasts, while 25 to 35 pounds goes to the grinder or stew pile.
Common Mistakes to Avoid
- Not cooling fast enough: Bacteria doubles every 20 minutes above 40 degrees. Get the carcass cool immediately after harvest.
- Leaving silverskin on: That iridescent membrane shrinks when cooked and turns tender meat into curled, chewy strips. Take the time to remove it from every cut.
- Grinding everything: Backstraps and hindquarter muscles deserve to be steaks and roasts. Only grind what cannot be used as whole-muscle cuts.
- Skipping aging: Even 3 to 5 days of wet aging in the refrigerator noticeably improves tenderness and mellows the gamey flavor.
- Using dull knives: Venison has more connective tissue per pound than beef. A dull knife turns a three-hour job into a six-hour frustration. Hone constantly.
- Not adding fat to ground venison: Pure ground venison makes terrible burgers. Add 15 to 20 percent pork fat and the difference is night and day.
What to Do with Bones and Scraps
Nothing should go to waste.
- Bones: Roast at 400 degrees for 45 minutes, then simmer for 12 to 24 hours for rich venison bone broth. Add a splash of vinegar to help extract minerals.
- Heart: Slice thin, season simply with salt and pepper, sear hot in a cast-iron pan. One of the best-kept secrets in wild game cooking.
- Liver: Soak overnight in milk, dredge in seasoned flour, pan-fry in butter. Serve with caramelized onions.
- Tallow: Render any deer fat you trim (though there is usually very little on a wild deer compared to domestic animals).
- Hide: Take to a local tannery for leather, or learn to brain-tan it yourself.
Processing your own deer is one of the most satisfying skills a hunter can develop. Every season you will get faster, your cuts will be cleaner, and your yield will improve. And the venison backstrap medallions you sear in a cast-iron skillet at midnight after a long day of processing — seasoned with nothing but salt, pepper, and a knob of butter — will be the best meal you eat all year.
For premium cuts of beef and wagyu to complement your wild game freezer, explore The Meatery's collections.
Frequently Asked Questions
How long does it take to process a whole deer?
A beginner should expect 4 to 6 hours from skinning through packaging. With practice, most home processors can complete the job in 2 to 3 hours. Field dressing takes an additional 15 to 30 minutes and should be done immediately after harvest.
How much meat do you get from a deer?
A 150-pound field-dressed white-tailed deer typically yields 50 to 65 pounds of boneless meat, roughly 40 to 45 percent of the field-dressed weight. Of that, 20 to 30 pounds becomes steaks and roasts while 25 to 35 pounds goes to the grinder.
Should you age venison before processing?
Yes. Even 3 to 5 days of wet aging in vacuum-sealed bags at 34 to 38 degrees Fahrenheit noticeably improves tenderness and reduces gamey flavor. Dry aging for 7 to 14 days gives even better results but requires a dedicated refrigerator with air circulation.
What fat ratio should you use for ground venison?
Add 15 to 20 percent pork fat or beef suet by weight. For every 4 pounds of venison trim, mix in 1 pound of pork fatback. Pure ground venison is too lean for burgers and sausage — the added fat provides the moisture and binding needed for proper texture.
How long does vacuum-sealed venison last in the freezer?
Properly vacuum-sealed venison maintains quality for 12 to 18 months in the freezer. Without vacuum sealing, freezer burn typically degrades quality within 3 to 6 months. Always label packages with the cut name, date, and weight.
What knives do you need to butcher a deer?
Three knives cover all deer processing tasks: a 6-inch semi-flexible boning knife for deboning and detail work, a 10-inch breaking knife for long cuts along the backstrap and separating large muscles, and a short skinning knife for hide removal. The Victorinox Fibrox Pro line is the industry standard.
More Expert Guides
How to Trim a Brisket: The Complete Butcher's Guide
Proper brisket trimming is the difference between a backyard experiment and competition-quality results. Here is the professional technique for shaping a whole packer brisket before it ever touches the smoker.
14 min readHow to Butcher a Whole Chicken: Step-by-Step Guide
Breaking down a whole chicken yourself saves 40-50% compared to buying individual parts. Here is the professional technique for turning one bird into perfectly portioned pieces.
14 min readHome Butchering Safety Guide: Essential Protocols for Safe Meat Processing
Learn professional butchering safety protocols from a master butcher with 25+ years of experience. Essential guidance for anyone processing meat at home.