Essential Meat Cutting Techniques Every Butcher Should Master
Essential Meat Cutting Techniques Every Butcher Should Master
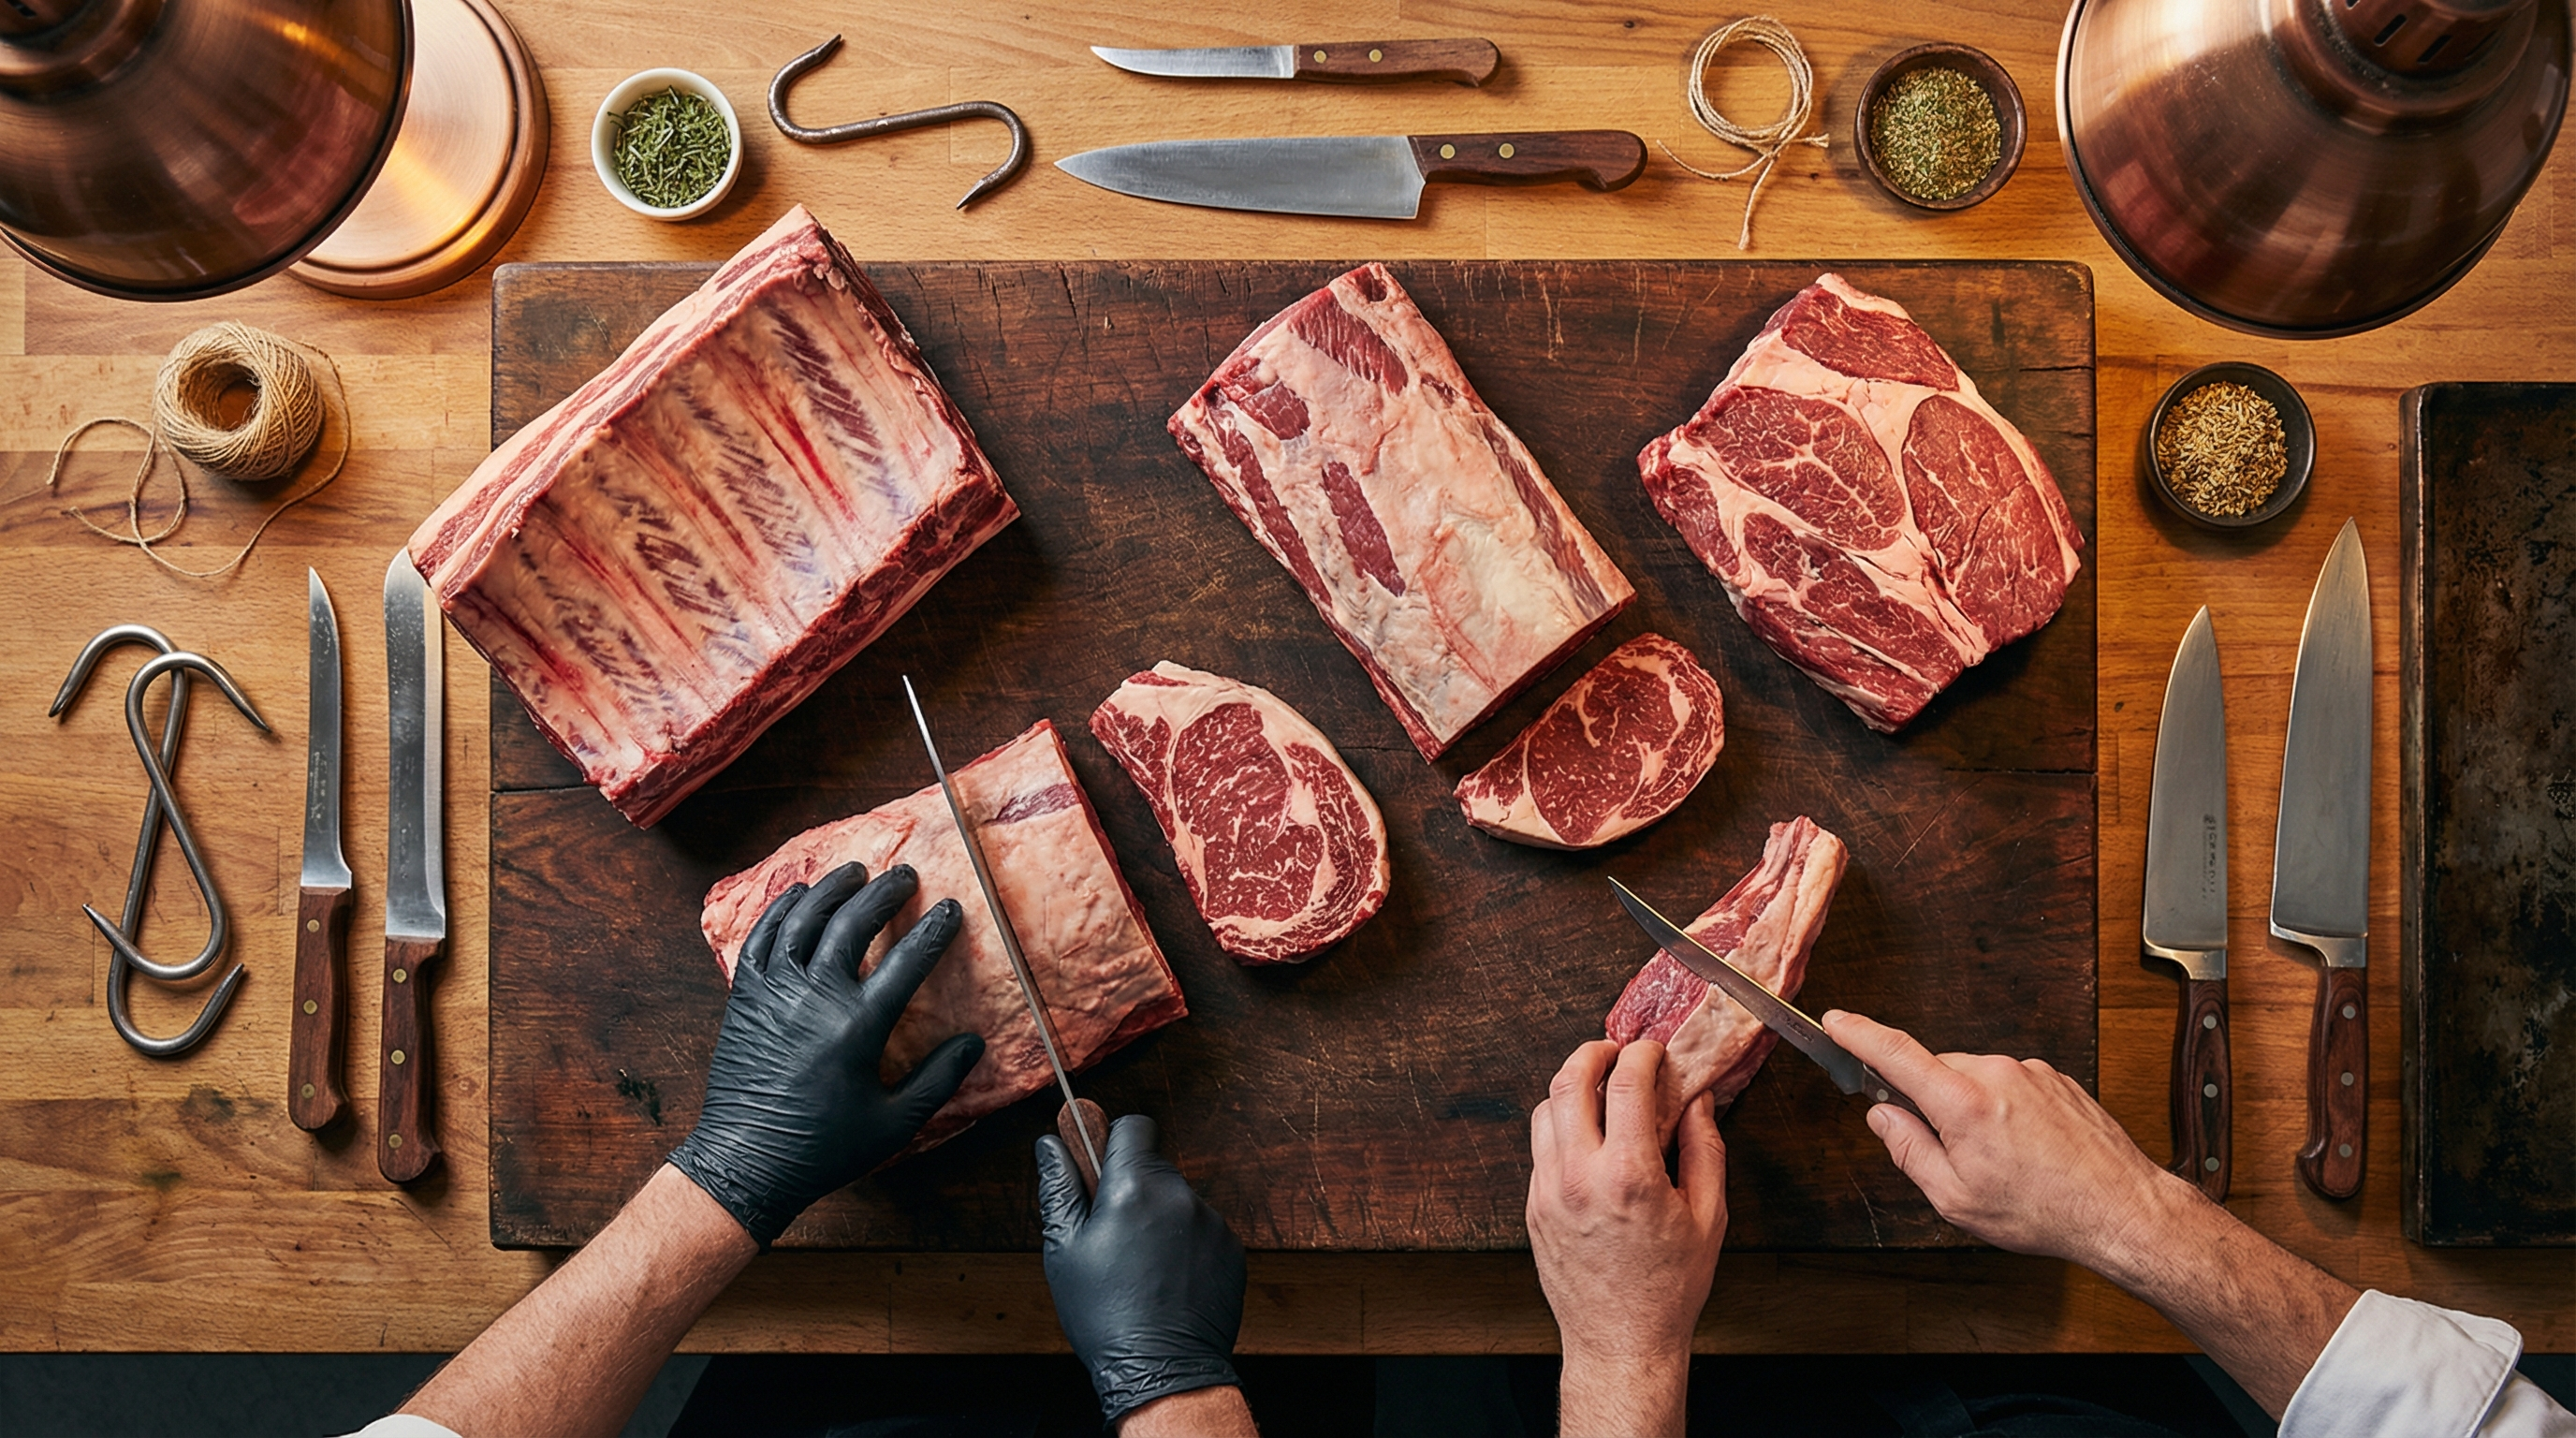
Knowing the names of cuts is one thing. Knowing how to make them is another entirely. Whether you are breaking down primals at home or refining your skills behind a professional counter, a handful of core meat cutting techniques form the foundation of all butchery work.
These eight techniques cover roughly 90 percent of the cuts you will ever need to make. Master them, and you can fabricate nearly any animal into clean, cookable portions — saving money, reducing waste, and producing results that rival any butcher shop.
1. Cross-Cutting: The Foundation of Portioning
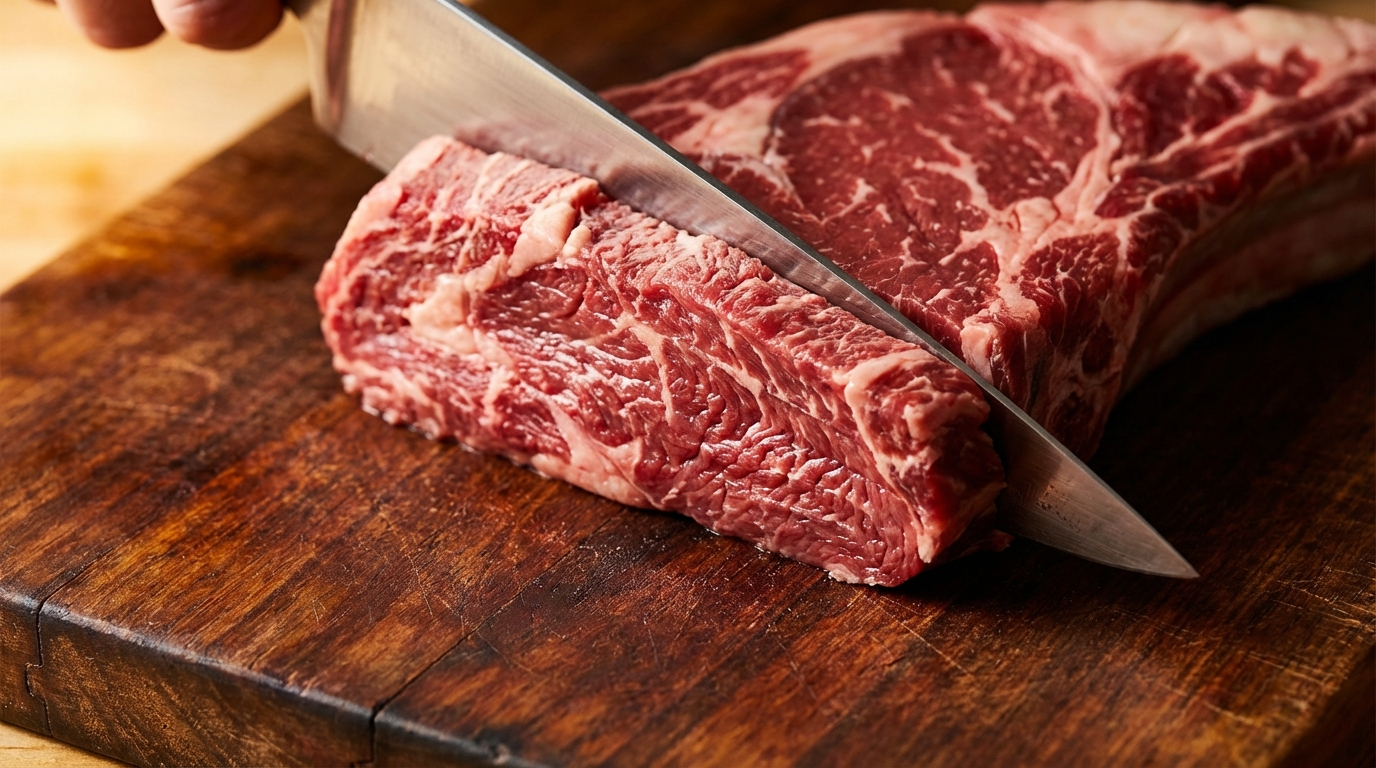
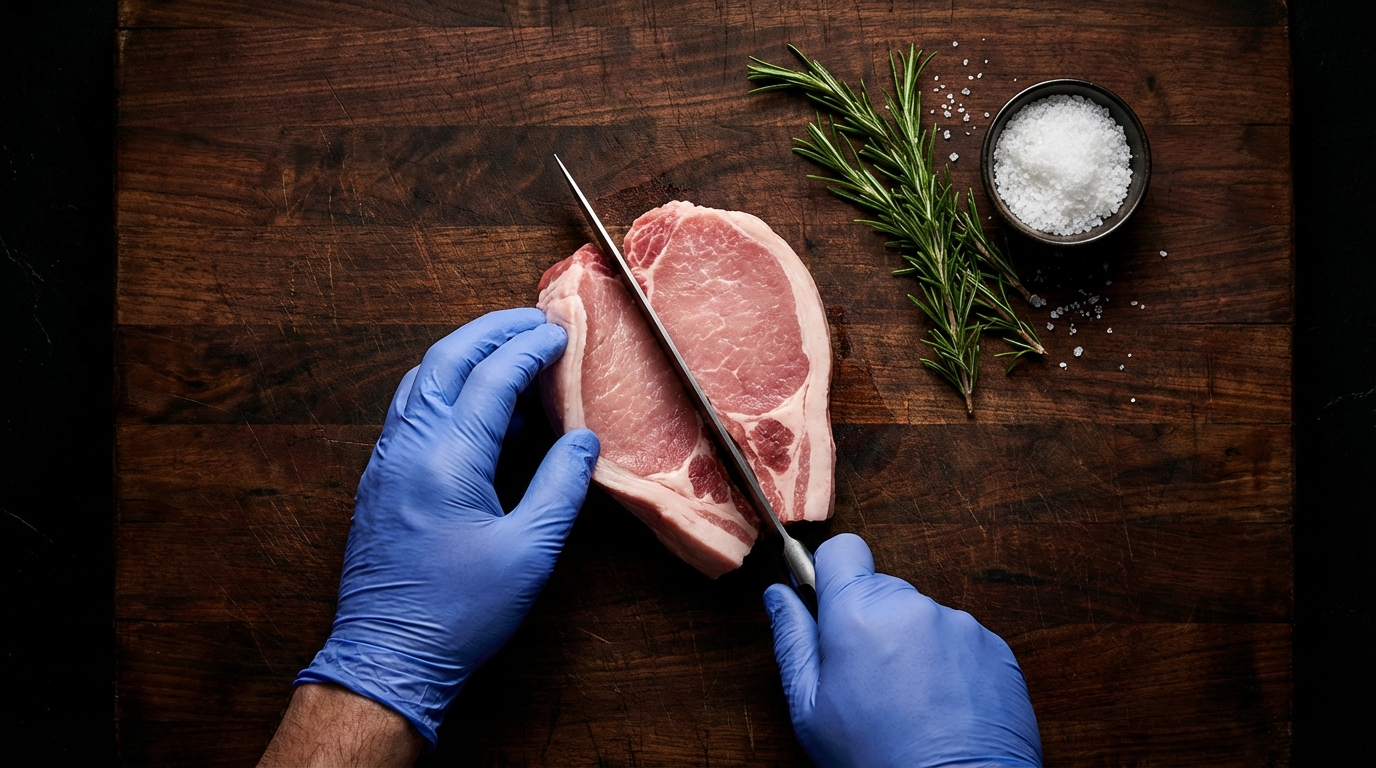
Cross-cutting means slicing perpendicular to the muscle grain — the direction the fibers run through the meat. This is how steaks, chops, and medallions are portioned from larger sub-primals.
The principle is simple but critical: cutting across the grain shortens the muscle fibers in each slice, making the final cooked piece significantly more tender. Cutting with the grain produces long, stringy pieces that are chewy regardless of how well they are cooked.
How to Cross-Cut Properly
- Identify the grain direction. Look at the surface of the meat for parallel lines running through the muscle. On a whole strip loin, these run lengthwise. On a flank steak, they run across the width.
- Position your knife perpendicular to those lines. Your blade should cross the fibers at a 90-degree angle.
- Use a single, smooth drawing stroke. Pull the knife through in one motion rather than pressing down and sawing. Let the sharp edge do the work.
- Maintain consistent thickness. Use your non-knife hand as a guide, moving it back the desired distance between each cut. Professional butchers develop a feel for consistent 1-inch or 1.5-inch portions without measuring.
Cross-cutting applies to nearly every steak and chop you will ever portion. It is the first technique to practice and the one you will use most often.
When to Angle the Cross-Cut
Some cuts benefit from angling the knife slightly — cutting on a bias rather than straight across. This produces wider slices from narrow muscles. Flank steak and skirt steak are commonly sliced on a bias at about 45 degrees against the grain, creating broader pieces that look better on the plate and have even shorter fiber segments.
2. Seam Cutting: Following Nature's Blueprint
Seam cutting is the technique of separating individual muscles along their natural connective tissue boundaries rather than cutting straight through them. We have a complete seam cutting guide on the site, but understanding the basics is essential context for any discussion of meat cutting techniques.
Every large piece of meat is actually multiple muscles held together by thin layers of fascia, silverskin, and fat. Seam cutting follows those layers to isolate each muscle individually. The result is cleaner cuts that cook more evenly, contain less tough connective tissue, and have consistent grain direction throughout.
The Basic Seam Cut
- Look for the white lines. Natural seams appear as thin white or silver lines on the surface of the meat, running between muscle groups.
- Insert your knife tip into the seam. Use a boning knife or narrow-bladed utility knife.
- Pull the muscles apart gently with your non-knife hand while guiding the blade along the connective tissue layer.
- Let the seam guide you. The blade should follow the natural boundary rather than forcing a path. If you hit heavy resistance, you may have drifted into muscle — back up and find the seam again.
Seam cutting is how the flat iron steak, Denver steak, teres major, and many other modern "butcher's cuts" are extracted from primals that were previously sold as generic roasts or ground into burger.
3. Butterflying: Doubling Surface Area
Butterflying is a horizontal cut that opens a thick piece of meat like a book, creating a thinner, wider piece with roughly double the surface area. It is used to create stuffable pockets, achieve more even cooking on thick cuts, and produce uniform thickness for quick grilling or sauteing.
How to Butterfly
- Place the meat on your cutting board with the thickest side facing you.
- Hold the meat flat with your non-knife hand on top.
- Insert your knife horizontally into the thickest edge, cutting parallel to the board. Work from the thick side toward the thin side.
- Cut through the center of the meat, stopping about half an inch from the opposite edge. Do not cut all the way through.
- Open the meat like a book. Press it flat. If needed, cover with plastic wrap and pound gently with a meat mallet to achieve even thickness.
Common Applications
- Thick pork chops — butterfly to reduce cooking time and create a pocket for stuffing with herbs, cheese, or apple
- Chicken breasts — butterfly for even thickness, then pound flat for scallopini or cutlets
- Beef tenderloin — butterfly a thick center-cut filet to create a thinner piece for faster searing
- Pork loin — butterfly and roll for stuffed roasts (porchetta-style preparations)
The key to a clean butterfly is keeping the blade perfectly horizontal. Angle the knife even slightly and you will end up with an uneven piece — thick on one side, thin on the other. Practice on inexpensive chicken breasts before moving to more valuable cuts.
4. Frenching: Cleaning Bones for Presentation
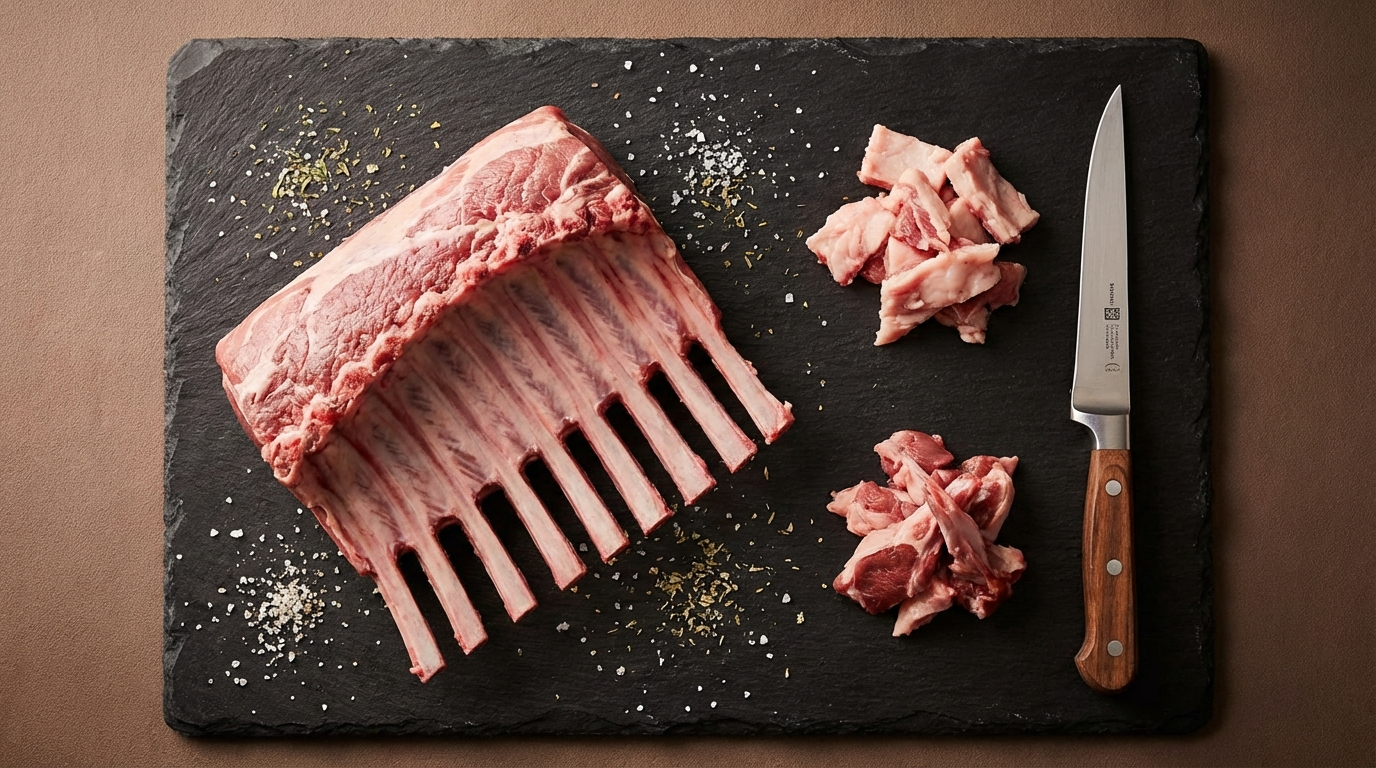
Frenching is the technique of scraping meat, fat, and connective tissue away from the end of a bone to expose clean white bone for presentation. It is most commonly applied to racks of lamb, pork crown roasts, and bone-in ribeye steaks (tomahawk cuts).
Beyond aesthetics, frenching serves a practical purpose: exposed bone acts as a natural handle for eating, and removing the tissue from the bone end prevents it from charring and creating off-flavors during roasting or grilling.
How to French a Rack of Lamb
- Score a line across the ribs about 1.5 inches from the eye of the loin muscle. This marks how far down you will clean.
- Cut through the fat cap and meat above the score line down to the bone, connecting all the ribs.
- Remove the flap of meat and fat between the ribs above your score line. Use a boning knife to cut between each rib, freeing the intercostal meat.
- Scrape each rib bone clean using the back of your knife or a dedicated bone scraper. Work from the meat end toward the tip, pushing connective tissue off the bone.
- Trim any remaining bits with a sharp paring knife. The bone should be completely clean and white.
Save the trim you remove during frenching. The intercostal meat and fat are excellent for stocks, ground meat blends, or rendered fat.
5. Silverskin Removal: Eliminating Toughness at the Source
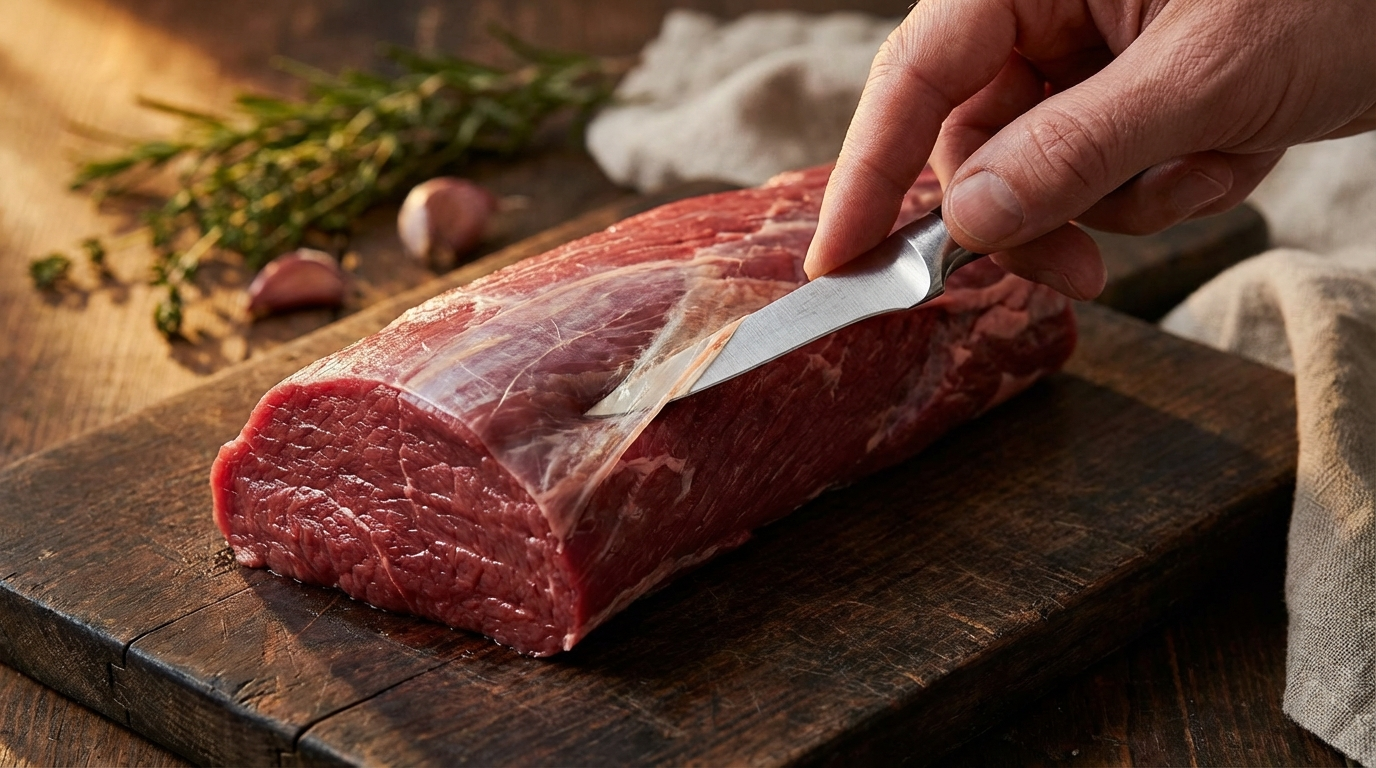
Silverskin is the thin, translucent membrane of connective tissue (epimysium) that covers many muscles. Unlike collagen-rich connective tissue that breaks down during slow cooking, silverskin remains tough and rubbery no matter how long or how gently you cook the meat. Removing it is essential for tender results.
You will encounter silverskin on tenderloins, pork loins, ribs (the membrane on the back side), and many other cuts. Learning to remove it cleanly — without taking too much meat with it — is one of the most practical butchery skills you can develop.
How to Remove Silverskin
- Identify the silverskin. It appears as a shiny, silvery-white membrane lying flat against the muscle surface. It is distinctly different from fat (which is opaque white or yellowish).
- Make a small starter cut. Slide the tip of a sharp boning knife under the edge of the silverskin, separating a small flap from the meat.
- Grip the freed flap. Use a paper towel for better grip — silverskin is slippery.
- Angle the blade slightly upward toward the silverskin (not down into the meat) and slide the knife away from you along the length of the muscle, keeping the blade pressed flat against the underside of the membrane.
- Work in strips. It is easier and cleaner to remove silverskin in several narrow strips (about 1 inch wide) rather than trying to peel it all off in one piece. Narrower strips give you more control and leave less meat attached to the membrane.
The most common mistake is angling the knife too steeply into the meat, which removes a thick layer of good meat along with the silverskin. Keep the blade nearly flat — it should shave along just beneath the membrane.
6. Spatchcocking: Flattening Whole Poultry
Spatchcocking (also called butterflying a bird) involves removing the backbone from a whole chicken, turkey, or other poultry, then pressing the bird flat. This creates an even-thickness piece that cooks in roughly half the time of a traditional roast, with crispier skin across the entire surface.
How to Spatchcock a Chicken
- Place the chicken breast-side down on your cutting board.
- Using heavy-duty kitchen shears or poultry shears, cut along one side of the backbone from tail to neck. Cut through the small rib bones — they offer little resistance to sharp shears.
- Cut along the other side of the backbone and remove it entirely. Save it for stock.
- Flip the bird breast-side up. Press down firmly on the breastbone with the heel of your hand until you hear it crack and the bird lies flat.
- Tuck the wing tips behind the breasts to prevent them from burning during cooking.
Spatchcocking works on any poultry — chicken, turkey, Cornish game hen, duck, quail. For larger birds like turkey, you may need to use a heavy knife or cleaver to cut through the thicker backbone.
The technique also works for cooking whole poultry on the grill. A spatchcocked chicken sits flat on the grate, cooks evenly over direct or indirect heat, and finishes in 35 to 45 minutes instead of 60 to 90.
7. Portioning by Weight: Consistency for Cooking
Professional butchers portion by weight, not by eye. Consistent portion sizes mean consistent cooking times, consistent plate presentations, and consistent food costs. A kitchen scale is as essential as a sharp knife.
How to Portion Consistently
- Weigh the whole piece. Know your starting weight and target portion size. A 5-pound strip loin portioned into 10-ounce steaks yields eight steaks.
- Calculate spacing. Divide the length of the piece by the number of portions. For a 16-inch strip loin yielding eight steaks, each cut is 2 inches apart.
- Mark your cuts. Use small nicks with the knife tip to mark where each cut will go before committing.
- Weigh each portion after cutting. Trim or adjust as needed. Professional tolerance is typically plus or minus half an ounce.
This is especially important when portioning expensive cuts like tenderloin, strip loin, and ribeye. A half-inch difference in thickness can mean the difference between a 6-ounce and 8-ounce filet — and a significant difference in cost per plate.
8. Trussing: Shaping Meat for Even Cooking
Trussing is not strictly a cutting technique, but it is an essential butchery skill that works hand-in-hand with cutting. Trussing uses butcher's twine to bind meat into a compact, uniform shape that cooks evenly.
When to Truss
- Beef tenderloin — the tapered tail end cooks much faster than the thick center. Fold the tail under and truss to create even thickness from end to end.
- Boneless roasts — any rolled or tied roast (pork loin, lamb leg, stuffed beef roulade) needs trussing to hold its shape during cooking.
- Whole poultry — trussing a chicken or turkey keeps the legs tight to the body, creating a compact shape that cooks more evenly and presents better.
The Basic Butcher's Knot
- Cut a length of butcher's twine about three times the length of the roast.
- Tie a slip knot around one end of the roast. Pull it snug but not tight enough to squeeze the meat.
- Loop the twine around the roast at 1 to 1.5 inch intervals, pulling each loop snug.
- Flip the roast over and run the twine lengthwise along the bottom, catching each loop.
- Tie off at the starting end. The roast should hold a compact, cylindrical shape.
Trussed roasts cook 10 to 15 percent faster than untrussed ones of the same weight because the compact shape reduces surface area relative to volume, creating more even heat penetration.
Putting It All Together
These eight techniques are not isolated skills — they combine and overlap in real butchery work. Breaking down a rack of lamb involves seam cutting to separate the rack from the shoulder, cross-cutting to portion individual chops, frenching to clean the rib bones, and silverskin removal on the loin eye. A whole chicken breakdown might involve spatchcocking, butterflying the breasts, and portioning the thighs.
The best way to develop these skills is progressive practice. Start with inexpensive cuts and whole chickens. Move to pork shoulders and beef chuck as your confidence grows. Eventually, work your way up to whole primals and sub-primals where clean technique directly translates to better cuts and less waste.
Keep your knives sharp, your cutting surface clean, and your movements deliberate. Speed comes with repetition — focus on precision first, and the efficiency will follow.
Frequently Asked Questions
What are the most important meat cutting techniques for beginners?
Start with cross-cutting (slicing steaks perpendicular to the grain) and silverskin removal. These two techniques apply to nearly every piece of meat you will work with. Add butterflying and spatchcocking next — they are straightforward and immediately useful for everyday cooking.
What is the difference between cross-cutting and bias cutting meat?
Cross-cutting slices straight across the grain at 90 degrees. Bias cutting angles the knife at about 45 degrees to the grain, producing wider slices from narrow muscles. Both cut against the grain for tenderness, but bias cutting is preferred for thin muscles like flank and skirt steak.
How do you remove silverskin without wasting meat?
Slide a sharp boning knife under the edge of the silverskin, grip the freed flap with a paper towel, then angle the blade slightly upward toward the membrane while sliding it along the muscle. Work in narrow 1-inch strips for better control. Keep the blade nearly flat to avoid cutting into the meat below.
What does frenching mean in butchery?
Frenching is scraping meat, fat, and connective tissue from the end of exposed bones for a clean presentation. It is most commonly done on racks of lamb, pork crown roasts, and tomahawk ribeye steaks. The exposed bone acts as a handle and prevents charring during cooking.
Why is cutting against the grain important?
Muscle fibers run in parallel bundles through meat. Cutting against (perpendicular to) the grain shortens those fibers in each slice, making the meat dramatically more tender to chew. Cutting with the grain leaves long fibers intact, resulting in tough, stringy pieces regardless of cooking method.
What knife is best for meat cutting techniques?
A 10-inch breaking knife handles most portioning and cross-cutting. A 6-inch boning knife is essential for seam cutting, silverskin removal, and frenching. Heavy kitchen shears are best for spatchcocking poultry. Keep all blades sharp — a dull knife is the biggest obstacle to clean technique.
More Expert Guides
How to Trim a Brisket: The Complete Butcher's Guide
Proper brisket trimming is the difference between a backyard experiment and competition-quality results. Here is the professional technique for shaping a whole packer brisket before it ever touches the smoker.
14 min readHow to Butcher a Whole Chicken: Step-by-Step Guide
Breaking down a whole chicken yourself saves 40-50% compared to buying individual parts. Here is the professional technique for turning one bird into perfectly portioned pieces.
14 min readHome Butchering Safety Guide: Essential Protocols for Safe Meat Processing
Learn professional butchering safety protocols from a master butcher with 25+ years of experience. Essential guidance for anyone processing meat at home.