How to Seam Cut Meat: The Butchery Technique That Unlocks Better Cuts
How to Seam Cut Meat: The Butchery Technique That Unlocks Better Cuts
Every large piece of meat is made up of individual muscles held together by thin layers of connective tissue — seams. Seam cutting (also called seam butchery) is the technique of separating those muscles along their natural boundaries rather than cutting straight through them with a saw or heavy knife.
The result? Individual muscles that cook more evenly, have consistent grain direction, and contain less tough connective tissue. It is one of the most fundamental butchery terms to understand — and one of the most rewarding techniques to practice.
Whether you are breaking down a beef chuck into individual roasts and steaks, separating a pork shoulder into its component muscles, or cleaning up a leg of lamb, seam cutting is the skill that separates competent home butchers from true craftspeople.
What Is Seam Cutting and Why It Matters
When you look at a large primal or sub-primal cut, you will notice thin white lines running between groups of red muscle. These are the seams — layers of connective tissue (fascia, silverskin, and fat) that separate one muscle from another. Every animal's muscles are organized this way, and those boundaries are remarkably consistent from carcass to carcass.
Seam cutting works with the anatomy rather than against it. Instead of slicing across multiple muscles (which creates cuts where different muscles with different grain directions and tenderness levels end up on the same plate), you follow the natural architecture to isolate each muscle individually.
This matters for three practical reasons:
- Even cooking. A single muscle has uniform fiber direction and thickness. It cooks more predictably than a cross-cut through two or three muscles of varying density.
- Better tenderness. When you remove the connective tissue between muscles, you eliminate the chewy seams that make some roasts and steaks frustrating to eat.
- Higher yield from lesser cuts. A whole beef chuck looks like one giant tough roast. Seam-cut it, and you find the flat iron, the teres major (petite tender), the chuck eye — individual muscles that rival more expensive cuts.
Professional butchers seam-cut every day. The flat iron steak — one of the most popular restaurant cuts — only exists because someone followed a seam to separate the infraspinatus muscle from the surrounding chuck. The Denver steak, the Sierra cut, and several other "new" cuts from the past two decades are all products of seam butchery applied to primals that were previously ground or sold as generic pot roasts.
Tools You Need for Seam Cutting
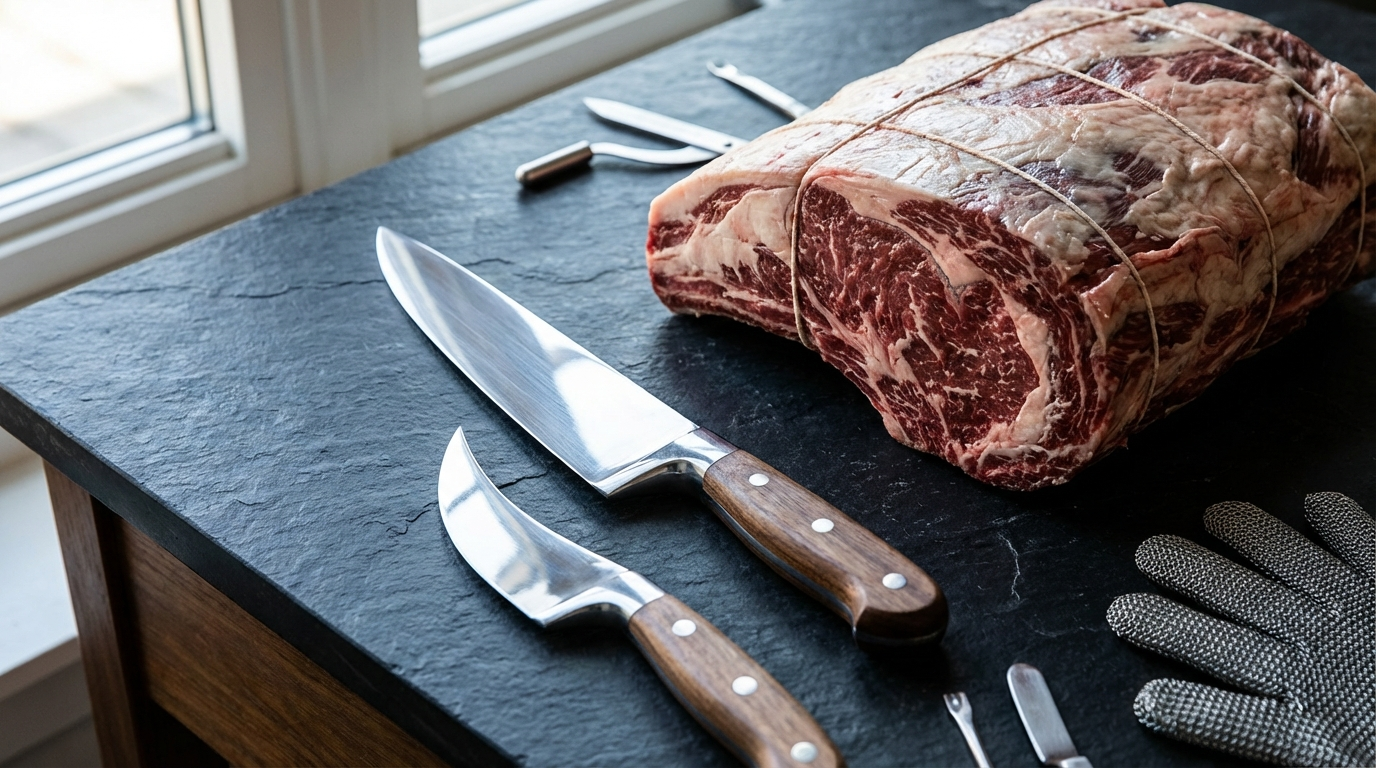
Seam cutting does not require an arsenal of specialized equipment. You need:
- Boning knife (5–7 inches)
- This is your primary tool. A flexible boning knife lets you follow curves and contours as you trace the seam. The slight flex in the blade prevents you from cutting too deeply into the meat. If you only buy one knife for seam work, make it a quality boning knife. See our knife guide for specific recommendations.
- Cutting board or butcher block
- Use a large, stable surface. A board that moves while you work is a safety hazard. Damp towel underneath if needed.
- Your hands
- This might sound obvious, but your fingers do as much work as the knife in seam cutting. You will use them to feel for seams, pull muscles apart, and guide separation. Keep them dry (paper towels nearby) for better grip.
- Clean towels or paper towels
- Meat gets slippery. Keeping your hands and the meat surface dry gives you control. Professional butchers keep a towel tucked into their apron at all times.
- Sharp knife steel or honing rod
- Seam cutting requires a razor-sharp edge. Hone your boning knife before you start and again every 10–15 minutes of cutting. A dull blade forces you to apply pressure, which means less control and rougher cuts.
Step-by-Step Seam Cutting Technique
The core technique is the same regardless of which primal you are breaking down. Once you understand the pattern, you can apply it to beef, pork, lamb, or venison.
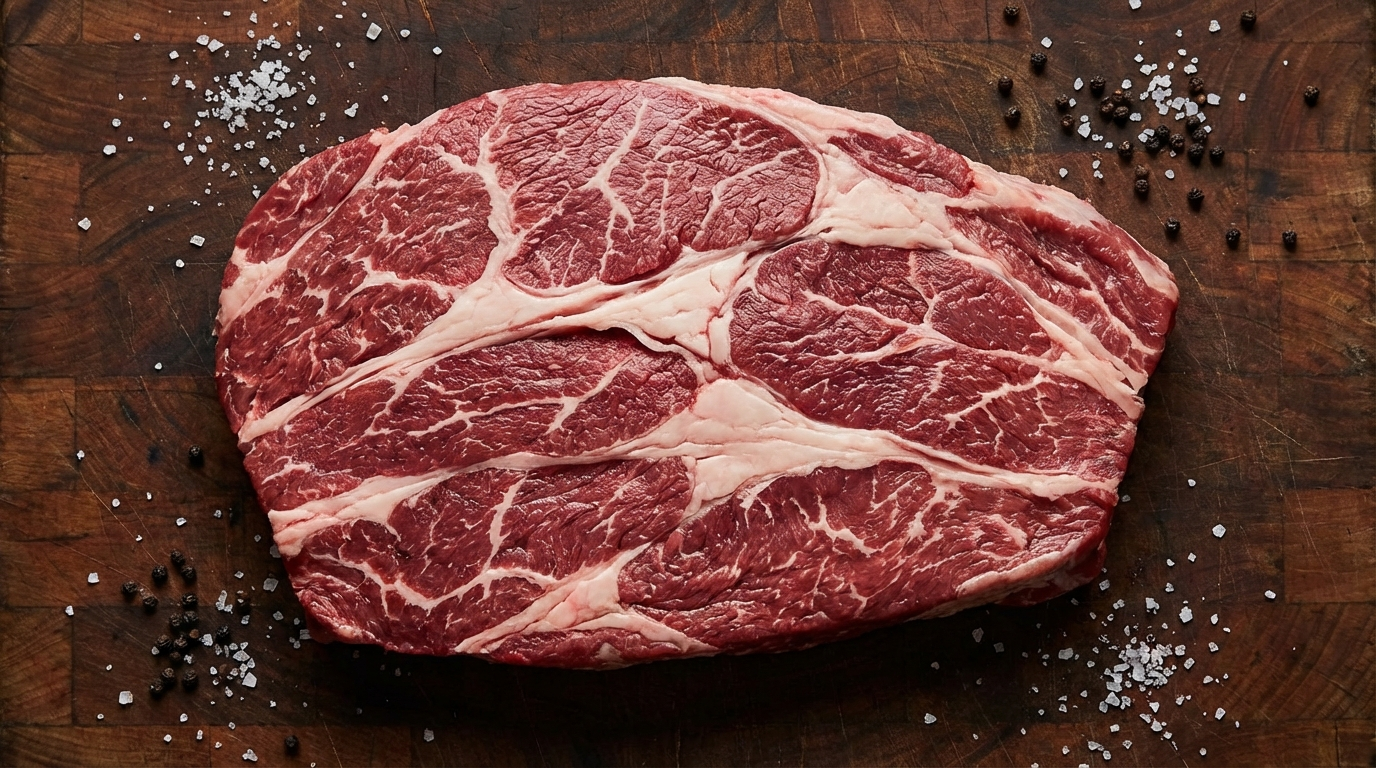
1. Identify the Seams
Before you make a single cut, study the meat. Look for the thin white lines of fat and connective tissue that outline individual muscles. Press gently with your fingers — you will feel a slight give where seams run. On the surface, seams often appear as visible lines where the muscle grain changes direction.
On a fresh piece of meat, the seams are more visible than on aged or vacuum-packed meat. If the surface is dark or dry, make a shallow cut to expose the interior and look for the white boundaries.
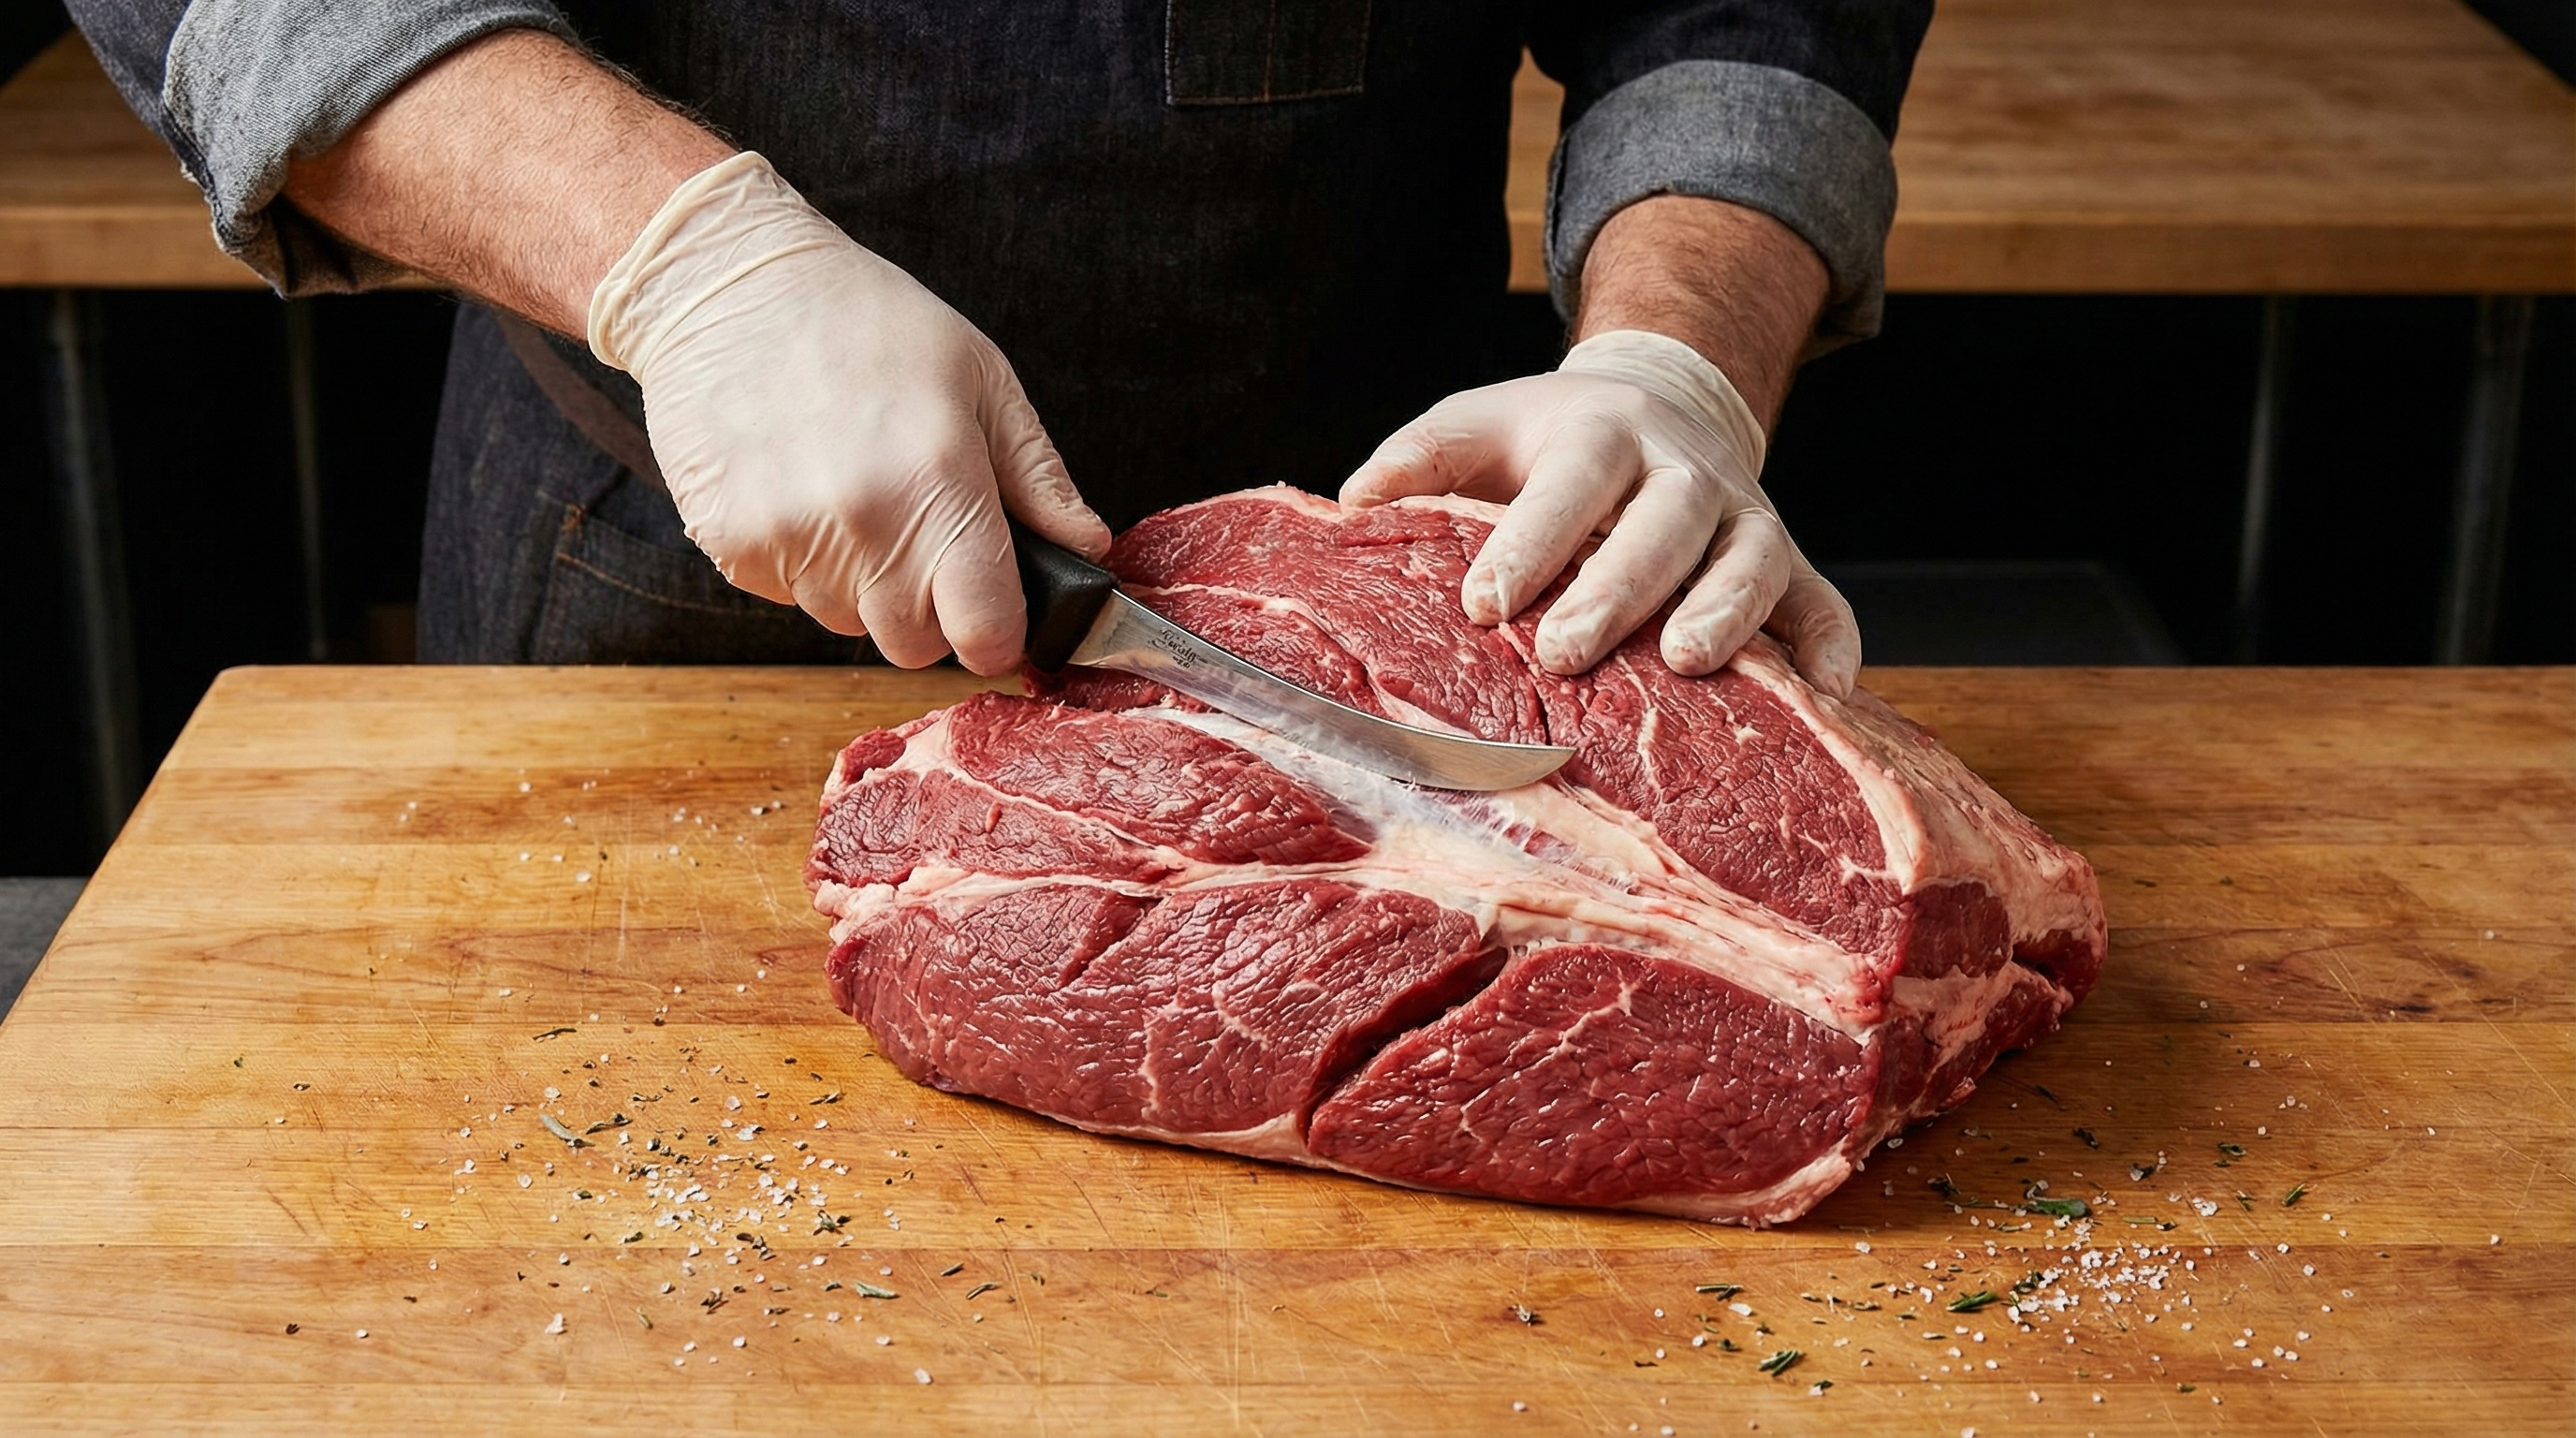
2. Start at an Exposed Edge
Find a spot where a seam is already visible at the edge of the cut. This is your entry point. Slide the tip of your boning knife into the seam, angling the blade to follow the connective tissue layer.
Make shallow, controlled strokes — let the knife barely do the work. You are not carving; you are tracing a path that already exists. If you feel resistance, you may be cutting into muscle rather than following the seam. Back up and reassess.
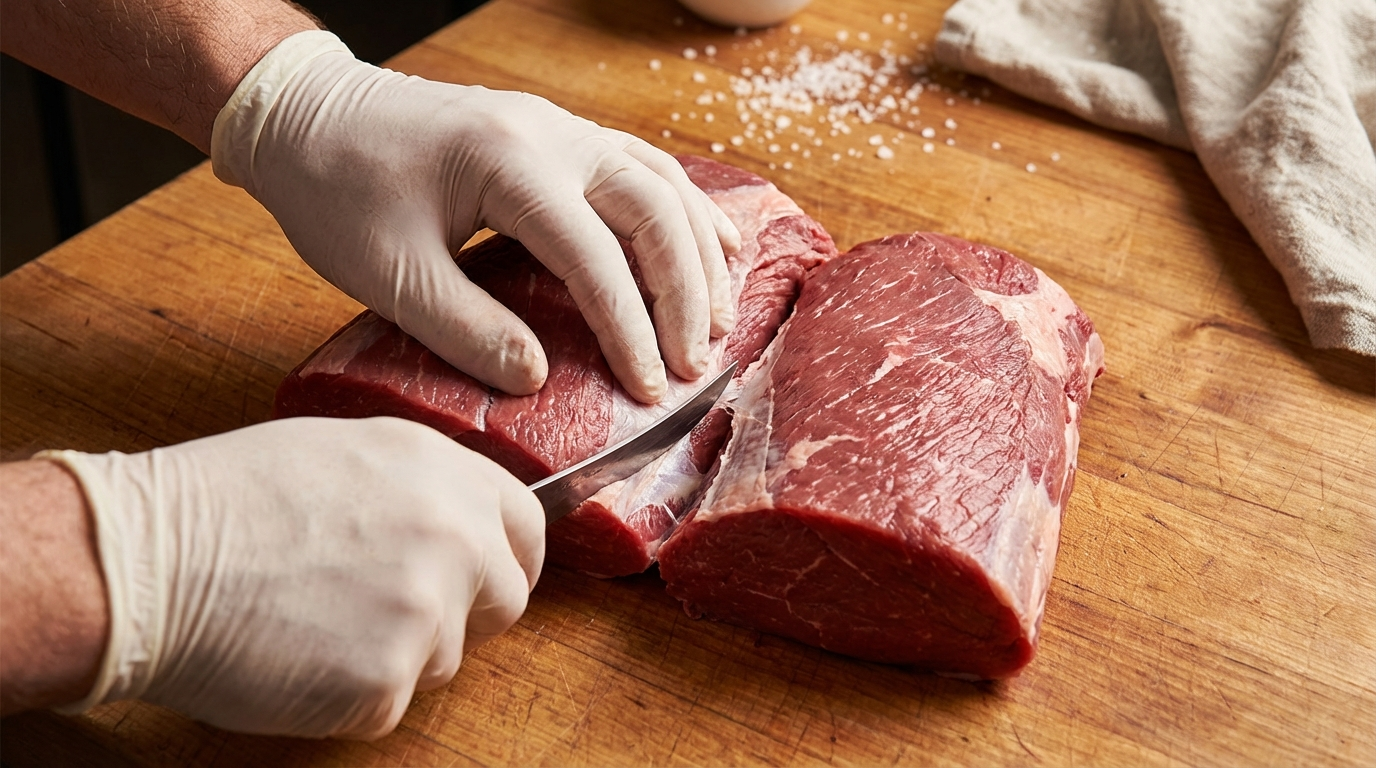
3. Use Your Hands to Pull Apart
Once you have opened the seam a few inches, put the knife down and use your fingers. Grip one muscle in each hand and gently pull them apart. The connective tissue between them will begin to separate on its own. Where it holds tight, use the tip of your knife to free it — short, precise strokes along the membrane.
This hand-pulling technique is the signature of seam cutting. It is gentler than the knife alone, wastes less meat, and gives you tactile feedback about where the seam runs. If you are pulling and the muscle tears rather than separating cleanly, stop — you have drifted off the seam.
4. Keep the Knife Close to the Seam
When you do need the knife, keep the blade right against the connective tissue. The goal is to leave the membrane on one muscle or the other, not to carve a canyon between them. Think of it as peeling — the membrane is like a label you are removing from one piece and leaving on the other.
Which side you leave the membrane on depends on what you plan to do with each piece. For cuts you will sear (steaks), leave the connective tissue on the trim side. For cuts you will braise, it matters less since slow cooking will dissolve the collagen.
5. Clean Up Each Separated Muscle
After separating two muscles, you will have loose flaps of connective tissue, fat, and silverskin on the surfaces. Trim these away — a process butchers call denuding. Slide the knife blade just under the membrane and pull it away, keeping the blade angled slightly upward to avoid cutting into the lean meat.
Save fat and usable trim for grinding or sausage making. One of the advantages of seam cutting over sawing through bone is that you generate clean, boneless trim — perfect for ground meat without bone fragments.
Best Cuts to Practice Seam Cutting
Some primals are easier to learn on than others. Start with these:
Beef Chuck
The chuck is the seam-cutter's playground. This single primal contains over a dozen individual muscles, including several that produce excellent steaks and roasts when isolated. Start by separating the chuck into its major sub-primals: the chuck roll, shoulder clod, and chuck flat. Then break those down further.
Key muscles to find: the flat iron (infraspinatus) — hidden beneath the shoulder blade, this is one of the most tender muscles on the animal. The teres major (petite tender or shoulder tender) — a small, cylindrical muscle that cooks like a miniature tenderloin. The chuck eye — the continuation of the ribeye muscle into the chuck, with nearly identical flavor and marbling.
Pork Shoulder (Boston Butt)
Pork shoulder has clear, wide seams that are easy to follow. It naturally separates into 3–4 large muscles plus several smaller ones. This is an excellent starting piece because the seams are forgiving — even if your technique is rough, you will end up with usable individual muscles.
Try separating the coppa (money muscle used for capicola) from the rest of the shoulder. The seam is prominent and the coppa is a prized cut for curing, grilling, or smoking.
Beef Round
The round (hindquarter leg) has three major muscles — the top round, bottom round, and eye of round — that separate along clear seams. Because these are large, relatively lean muscles, they respond dramatically to seam cutting. A whole round roast can be tough and uneven, but individually seam-cut muscles cook much more consistently.
Leg of Lamb
A deboned leg of lamb is an excellent seam-cutting exercise. It separates into the top (inside), bottom (outside), and eye muscles. Each one is perfect for a different application — roasting, grilling, or braising.
Common Mistakes and How to Avoid Them
Seam cutting is forgiving, but a few mistakes can reduce your yield or produce messy results:
- Cutting too deep. If your knife strokes go more than half an inch into the muscle, you are not following the seam — you are cutting through it. Back up, find the membrane, and use shallower strokes.
- Forcing the separation. If you are pulling hard and the muscles are not coming apart, the knife needs to free more connective tissue first. Never yank muscles apart — it tears the meat and wastes product.
- Using a dull knife. A dull blade turns seam cutting into a wrestling match. You apply more pressure, lose precision, and cut into muscle you meant to preserve. Hone every 10–15 minutes.
- Ignoring the grain direction. When you expose a seam, look at which direction the muscle fibers run on each side. If both sides show the same grain direction, you may not be at a true seam — you might be cutting through a single muscle.
- Working with cold, stiff meat. Meat straight from the refrigerator is harder to seam-cut because the fat and connective tissue are stiff. Let the piece temper for 15–20 minutes at room temperature. It should be cool but not rigid.
- Skipping the cleanup. After separating muscles, trim the exposed silverskin and connective tissue. Leaving it on creates chewy spots when cooking and makes the finished cut look rough. A clean seam-cut muscle should be almost entirely red lean meat.
Seam Cutting vs Cross Cutting
Traditional supermarket butchery relies heavily on cross cutting — sawing straight through a primal (bones and all) to create uniform-thickness pieces. Think T-bone steaks, bone-in chuck roasts, or cross-cut short ribs. A band saw does the work, and the cuts are fast to produce.
Seam cutting takes longer but produces fundamentally different — and often superior — results:
| Factor | Cross Cutting | Seam Cutting |
|---|---|---|
| Speed | Fast (band saw) | Slower (hand knife) |
| Equipment | Band saw required | Boning knife only |
| Consistency | Multiple muscles per cut | Single muscle per cut |
| Cooking | Uneven (mixed muscles) | Even (uniform muscle) |
| Tenderness | Varies within each piece | Consistent throughout |
| Trim quality | Bone dust, fragments | Clean, boneless trim |
| Home friendly | Needs band saw | Knife and cutting board |
For home butchers without a band saw, seam cutting is not just better — it is the only practical option for breaking down large primals. And the results speak for themselves: restaurants that adopted seam butchery programs have found hidden value in primals that were previously destined for the grinder.
Tips From Professional Butchers
A few principles that professional butchers apply every day:
- Let your fingers lead. Your fingertips can feel seams that your eyes cannot see. Run your thumb along the surface of the meat, pressing gently. Where you feel a dip or a ridge, there is likely a seam below.
- Gravity is your friend. When you have partially opened a seam, let the weight of the meat help pull the muscles apart. Hold the piece up so the separated portion hangs down, then work the remaining attachment from above.
- Work from thick to thin. Start separating at the thickest part of the seam where there is more connective tissue to follow. As you approach thinner areas where muscles merge tightly, the seam becomes harder to track — by then you will have momentum and context.
- Map the cut before starting. Experienced butchers can look at a primal and mentally map where every seam runs. Before you cut, study the piece. Identify the muscles you want to isolate and plan your sequence. The chuck, for example, is most efficiently broken down by removing the flat iron first, then the teres major, then the chuck eye.
- Save everything. The connective tissue, fat, and small trim pieces you remove have value. Fat renders into tallow. Connective tissue adds body to stock. Lean trim becomes excellent ground meat or sausage. A skilled seam cutter generates almost zero waste.
Frequently Asked Questions
What does seam cutting mean in butchery?
Seam cutting is a butchery technique where you separate individual muscles by following the natural connective tissue boundaries (seams) between them, rather than cutting straight through multiple muscles. It produces single-muscle cuts that cook more evenly and are more tender.
What knife is best for seam cutting meat?
A flexible boning knife (5–7 inches) is the best tool for seam cutting. The slight flex in the blade allows you to follow the curves and contours of the connective tissue seams without cutting too deeply into the muscle.
What is the difference between seam cutting and cross cutting?
Seam cutting follows natural muscle boundaries to isolate individual muscles using a hand knife. Cross cutting saws straight through a primal (bones and all) using a band saw to create uniform-thickness portions. Seam cutting produces single-muscle cuts that cook more evenly; cross cutting is faster but creates multi-muscle pieces.
What is the best meat to practice seam cutting on?
Pork shoulder (Boston butt) is the best cut to learn seam cutting — it has wide, easy-to-follow seams and naturally separates into 3–4 large muscles. Beef chuck is the next step up, offering more complexity with over a dozen individual muscles including the flat iron and teres major.
Can you seam cut at home without professional equipment?
Yes. Seam cutting requires only a sharp boning knife and a stable cutting board — no band saw or special equipment needed. It is one of the most home-friendly butchery techniques because it relies on hand skill and a single knife rather than expensive machinery.
More Expert Guides
How to Trim a Brisket: The Complete Butcher's Guide
Proper brisket trimming is the difference between a backyard experiment and competition-quality results. Here is the professional technique for shaping a whole packer brisket before it ever touches the smoker.
14 min readHow to Butcher a Whole Chicken: Step-by-Step Guide
Breaking down a whole chicken yourself saves 40-50% compared to buying individual parts. Here is the professional technique for turning one bird into perfectly portioned pieces.
14 min readHome Butchering Safety Guide: Essential Protocols for Safe Meat Processing
Learn professional butchering safety protocols from a master butcher with 25+ years of experience. Essential guidance for anyone processing meat at home.